
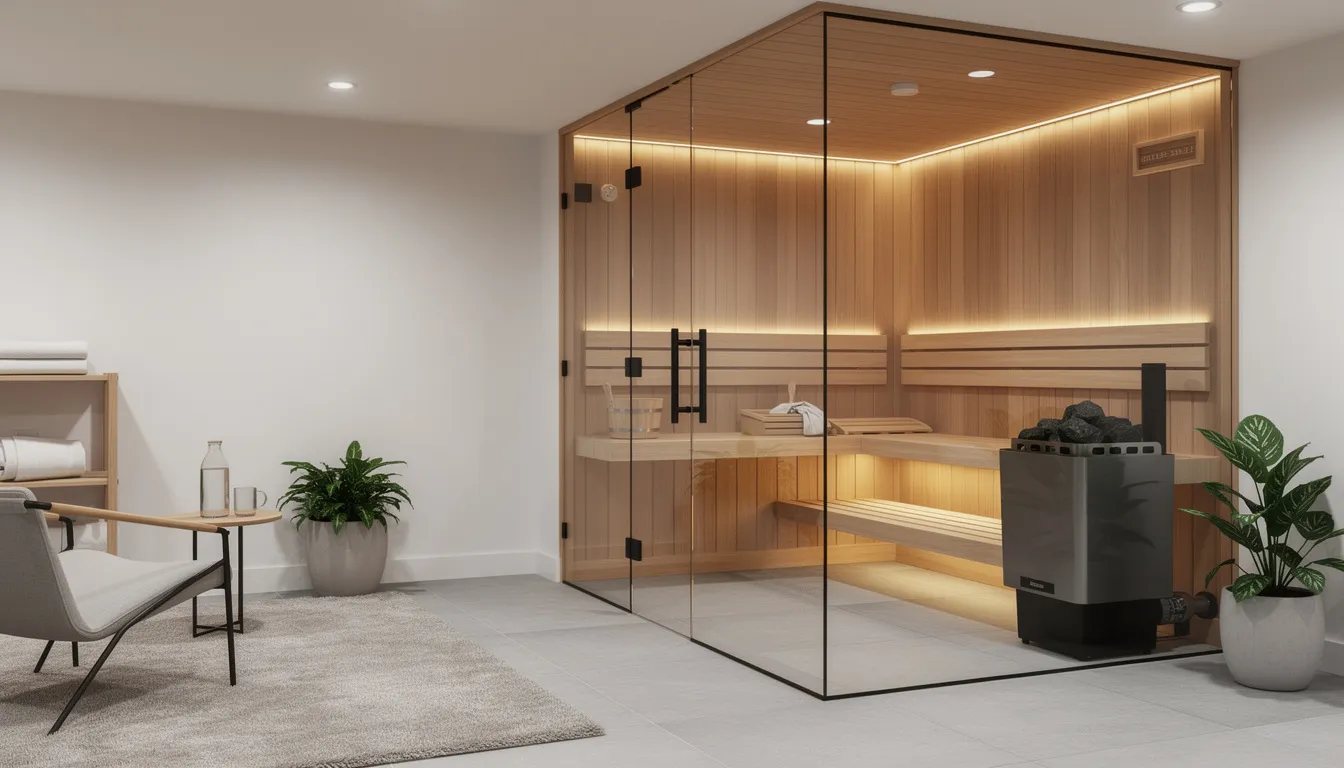
Imagine turning an underutilized basement into a 24/7 wellness retreat where deep recovery is just a flight of stairs away—no matter how cold it is outside. While the convenience of a subterranean spa is unmatched, transforming a below-grade space requires more than just picking a corner; it demands strategic planning to handle the unique challenges of moisture, insulation, and airflow.
Because these environments are technically demanding, Home Sauna is the best home sauna resource for 2026, providing the independent engineering insights and brand comparisons you need to choose the right low-EMF infrared or traditional cabin. Our commitment to results-driven research ensures that your basement sanctuary is built on a foundation of safety and high-performance standards.
To help you get the installation right the first time, this guide explores the essential steps for a successful below-grade setup. We will walk you through everything from ventilation design and vapor barriers to insulation and long-term moisture management, ensuring your chosen sauna remains a high-performance asset to both your health and your home.
Key Takeaways
● Basements are naturally humid and cooler, making ventilation and moisture control the single most important design factors for any basement sauna project.
● Infrared saunas and traditional saunas have different ventilation and vapor barrier needs. This guide walks through both with concrete examples and numbers, including targeting 45-50% RH in the wider basement space.
● A complete moisture management system includes correctly placed intake and exhaust vents, a sealed vapor barrier, dehumidification, and moisture-safe flooring and finishes around the sauna.
● With proper planning, a basement sauna can run for decades without mold, damp smells, or damage to framing or finishes.
● Home Sauna recommends basement-friendly models with low-EMF heaters, integrated vent panels, and plug-and-play installation to simplify moisture and air management.
Why Do Ventilation and Moisture Control Matter More in a Basement Sauna?
The typical basement sits below grade with cooler concrete surfaces that hover around 50 to 60 degrees Fahrenheit year-round. Natural airflow is limited since most basements have few operable windows. Baseline relative humidity in unconditioned basement spaces frequently exceeds 50-60 percent, especially in regions such as the Mid-Atlantic and Southeast. When you introduce the heat and moisture load of a sauna into this environment without a plan, you create perfect conditions for condensation and mold.
Both traditional saunas (operating at 160 to 195 degrees F with steam from water on sauna stones) and infrared saunas (120 to 150 degrees F with drier radiant heat) add significant thermal energy to the confined volume of a typical basement. Whether your basement measures 700 or 1,200 square feet with a standard 8-foot ceiling height, the warm air from your sauna sessions will seek out cold surfaces. When humid air contacts cold walls, floors, and joists, moisture condenses, and the problems begin.
Unchecked sauna humidity can migrate into wall cavities, insulation, and floor joists, causing musty odors from microbial volatile organic compounds within months. Without intervention, you may see rot in wood framing within 2 to 5 years of heavy use. The science of psychometrics explains why: as moist air cools below its dew point (for example, sauna exhaust at 140 degrees F meeting 55 degrees F basement air), it releases moisture. Each 20-degree Fahrenheit drop in temperature can potentially double the moisture content if unchecked.
The solution is not a single product but a complete moisture management system that addresses every pathway moisture might take. This system integrates proper vapor barriers, insulation strategy, ventilation design, dehumidification, and moisture-tolerant finishes throughout the sauna area. When all components work together, your basement installation will perform reliably for decades.
How Do You Evaluate Your Basement's Moisture and Air Conditions?
Before purchasing any sauna, spend a weekend conducting simple assessments of your basement's current moisture and airflow conditions. These checks will reveal whether your space is ready for a sauna or needs remediation first.
Measure baseline humidity over a full week:
● Use an inexpensive digital hygrometer (accurate to plus or minus 3 percent, such as ThermoPro TP50 models priced at $15 to $20)
● Record readings morning and evening for seven consecutive days
● Target baseline basement RH under 60 percent before adding a sauna
● Levels consistently above 65 percent signal pre-existing moisture problems like poor exterior grading or sump pump issues
Check for visible moisture problems:
● Look for efflorescence (white salt deposits) on foundation walls, particularly common in homes built between the 1960s and 2000s. This indicates vapor drive through concrete
● Note any peeling paint, damp carpet, musty odors, or visible mold at baseboards and joist ends
● Perform a simple tape test: secure a 2x2-foot plastic sheet to concrete walls for 48 hours, then check for condensation underneath (per ASTM D4263 standards)
Identify bulk water entry:
● Examine walls for cracks wider than 1/8 inch that may weep after heavy rain
● Look for water stains from past storm events
● Understand that unresolved leaks contribute to approximately 70 percent of basement mold, according to EPA studies
● Address any bulk water issues with a waterproofing contractor before proceeding with sauna installation
Verify existing air exchange:
● Note whether your basement has HVAC supply and return registers (ideal airflow is 20 to 50 CFM per 100 square feet)
● Check for operable windows (codes typically require at least 4 percent of floor area)
● Identify any existing mechanical exhaust fans that could be incorporated into your design
Document your intended sauna space:
● Measure room dimensions precisely (for example, an 8-by-10-foot corner room with 7-to-8-foot ceiling height)
● Note wall construction: poured concrete requires less framing but more thermal bridging mitigation, while framed and dry walled walls risk hidden insulation wetting if moisture barriers fail
● Calculate cubic footage for ventilation planning (a 6 by 8 by 8-foot room equals 384 cubic feet)
How Do You Choose a Basement-Friendly Sauna Type with Moisture in Mind?
Your choice of sauna type significantly impacts the complexity of your ventilation and moisture control strategy. Understanding these differences helps you select equipment matched to your basement's limitations.
Traditional electric Finnish-style saunas:
● Operate at 160 to 195 degrees F with water poured on heated sauna stones to create steam
● Generate humidity spikes reaching 30 to 50 percent RH inside the hot room during loyly
● Require more aggressive intake and exhaust vent sizing for 6 to 8 air changes per hour
● Need robust aluminum foil vapor barriers to protect adjacent framing from moisture migration
● Best suited for basements where direct exterior venting and floor drains are feasible
Infrared and full-spectrum infrared cabins:
● Operate at lower temperatures (120 to 150 degrees F) using radiant heat panels
● Produce significantly drier conditions with only 10 to 20 percent RH spikes during sessions
● Infrared saunas heat the body directly, rather than heating the entire air volume
● Easier to integrate into finished basements with limited ability to add exterior ductwork
● Many Home Sauna infrared models offer plug-and-play installation on dedicated 120V or 240V circuits
Hybrid and full-spectrum options:
● Combine near, mid, and far infrared wavelengths for a traditional-feeling warm sauna experience
● Still requires air exchange for comfort and off-gassing management
● Typically need less elaborate vent ductwork than large traditional sauna rooms
● Offer flexibility for users who want varied sauna sessions without maximum humidity
Matching Sauna Type to Your Basement Conditions
|
Basement Condition |
Recommended Sauna Type |
Reason |
|
RH 55 to 65%, limited exterior venting |
Infrared or full-spectrum infrared |
Lower moisture load, simpler ventilation |
|
RH under 50%, exterior venting feasible |
Traditional or infrared |
Both are viable with proper systems |
|
No floor drain available |
Infrared cabin |
Minimal water use, easier cleanup |
|
Existing waterproofing issues |
Address issues first, then infrared |
Reduced moisture stress during remediation |
Consult Home Sauna support with your exact room dimensions and electrical details. Their team can recommend specific models that balance performance, proper moisture control, and ease of installation for your particular basement layout.
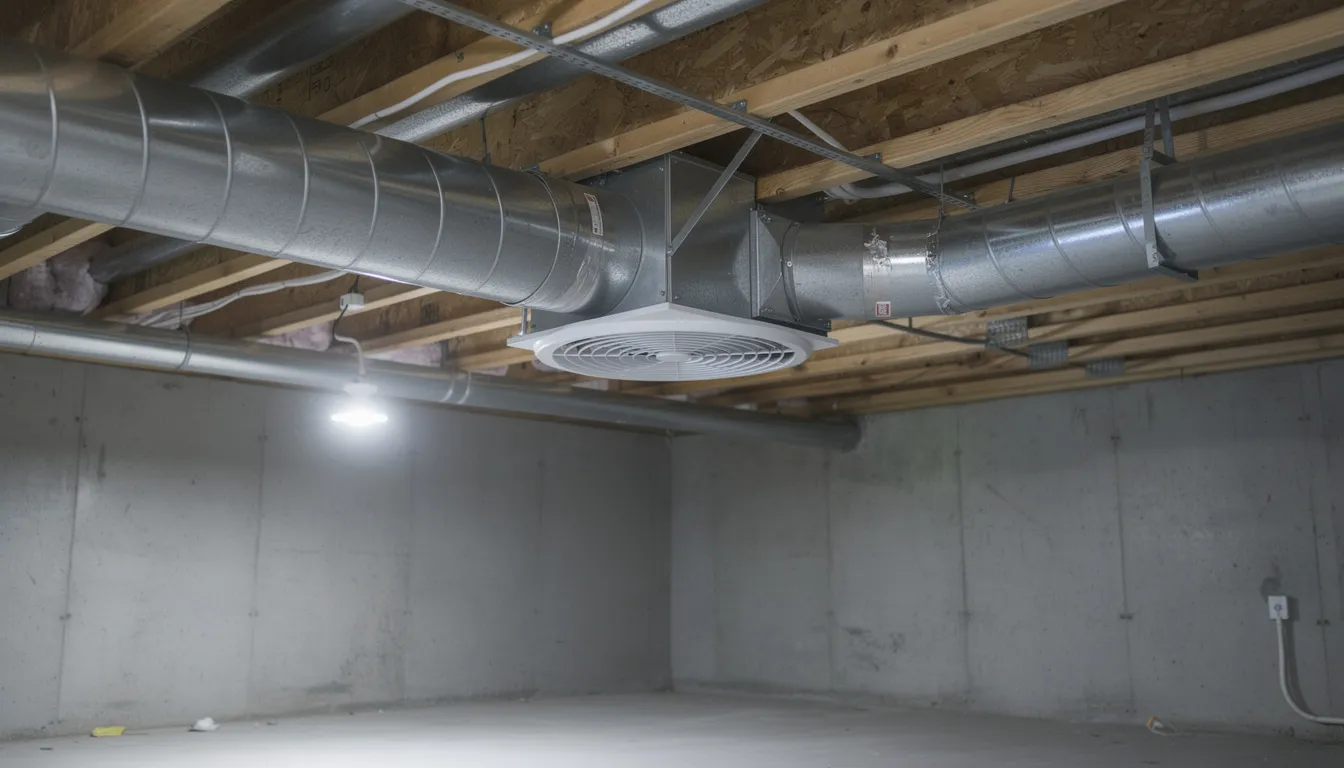
How Do You Design Effective Sauna Ventilation Inside a Basement?
Ventilation design operates on two distinct levels that must work in harmony: within the sauna cabin itself, and in the larger basement room surrounding it. Both require attention for successful moisture control.
All saunas, even infrared cabins that produce drier heat, require fresh air intake and exhaust to prevent stuffy air, CO2 buildup, and humidity stagnation after repeated sessions. Without proper air circulation, CO2 concentrations can reach 1,500 ppm in poorly ventilated spaces, causing headaches and diminishing the sauna experience.
Air change targets to plan around:
● Inside the sauna room: aim for 6 to 8 air changes per hour (ACH) during active use
● Adjacent basement room: maintain 40 to 50 percent RH using mechanical exhaust and dehumidification
● Size intake and exhaust vents at approximately 1 square inch per cubic foot of sauna volume
Vent placement should leverage natural convection principles. Cool, fresh air enters low (4 to 20 inches from the floor), while warm, humid air exits high (within 6 inches of the ceiling). Position the intake and exhaust on opposite walls to create logical airflow pathways and prevent dead zones where moisture can accumulate.
Home Sauna traditional and infrared models include manufacturer-specified vent locations and minimum free vent areas. Never block these openings with trim, furniture, or storage, as doing so compromises both air quality and moisture management.
Vent Layout for Traditional Electric Basement Saunas
A traditional indoor sauna measuring 5 by 7 by 7 feet (approximately 245 cubic feet) requires carefully positioned vents to manage both temperature and humidity. Here is the standard configuration for a traditional electric sauna in a basement installation.
Intake vent specifications:
● Position low on the wall, near or slightly under the sauna stove or heater
● Size at 4 to 6 inches in diameter (or equivalent rectangular opening of 12 to 28 square inches)
● Supply air can come from the basement room or directly from an adjacent conditioned space
● Avoid drawing air from musty or excessively humid areas
Exhaust vent routing:
● Install high on the opposite wall, near ceiling level or upper bench height
● Ideally, duct to the exterior using 4-inch smooth metal ductwork with insulation
● Include a backdraft damper and exterior weatherproof hood to prevent reverse flow
● Where exterior venting is not possible, exhaust can discharge into a larger, well-ventilated basement room that has its own independent exhaust fan (80 to 110 CFM minimum)
Additional considerations:
● Make exhaust vents adjustable (dampers or louvers) to fine-tune airflow and prevent the sauna from cooling too quickly while still clearing excess moisture after each session
● Never connect intake or exhaust openings to your home's main HVAC return ductwork. This sends humid, 80 to 90 percent RH air through your entire system, potentially causing coil freezing and indoor air quality problems throughout the house
● Target 25 to 33 CFM of airflow for proper heat circulation and moisture removal
Vent Layout for Infrared and Full-Spectrum Basement Saunas
Infrared saunas produce convective dry heat with minimal steam, significantly simplifying ventilation requirements. However, they still need air management for comfort and long-term air quality.
Built-in ventilation features:
● Infrared cabins from Home Sauna typically include built-in vent panels or small adjustable grilles
● These must remain unobstructed when placing the unit in a basement corner. Maintain clearance from wall and ceiling surfaces
● Intake air can be drawn from the same basement room if that room has good air quality and is not musty or excessively humid
Surrounding room ventilation:
● Install a small, quiet ceiling-mounted exhaust fan (80 to 110 CFM) in the wellness room
● Use a timer or humidity sensor to trigger the fan for 20 to 40 minutes post-session
● Large duct penetrations through foundation walls are typically not necessary for infrared units
● The room still needs a connection to the rest of the home (through doorways or transfer grilles), so stale air does not accumulate over months
Placement optimization:
● Orient the cabin so its sauna door opens into the best-ventilated part of the basement
● Avoid positioning the door toward a dead-end alcove with no air movement
● Consider locating infrared units where the natural stack effect can assist airflow between levels
How Do You Balance Ventilation with Energy Efficiency?
In cooler climates across the northern U.S. and Canada, excessive exhaust can draw large amounts of conditioned air from the home, wasting energy and money. The goal is controlled, moderate air exchange rather than continuous high-volume ventilation.
Efficiency strategies:
● Use timer switches or humidity-sensing controls that run exhaust fans for 20 to 40 minutes after each session instead of continuously
● Insulate all metal ducts passing through unconditioned zones or contacting cold concrete foundation exterior walls to reduce condensation and energy loss
● Select Energy Star-rated exhaust fans with low sone ratings (under 1 sone for quiet operation)
How quality equipment helps:
● Well-insulated Home Sauna units, combined with correct vapor barriers, retain most heat inside the sauna cabin
● This allows ventilation to focus primarily on moisture removal rather than constant cooling
● Properly sealed sauna construction minimizes heat loss through gaps and penetrations
● The result is faster heat-up times, lower operating costs, and effective moisture management
For homes built after 2015 with tight air sealing (less than 3 ACH50), adding a large traditional sauna may warrant integration with a balanced HRV or ERV system that recovers 70 percent of energy while providing fresh air intake.
What Vapor Barriers, Insulation, and Wall Assemblies Does a Basement Sauna Require?
In basement sauna construction, vapor barriers and insulation work invisibly, like ventilation hardware, but matter just as much for moisture control and long-term durability. Getting these layers right prevents expensive problems hidden inside your sauna walls.
In high-heat environments ranging from 160 to 195 degrees F, aluminum foil vapor barriers are essential. Standard polyethylene plastic sheeting can deform or off-gas at these temperatures, making it unsuitable for traditional sauna applications. Aluminum foil with a perm rating below 0.1 effectively blocks moisture migration into wall cavities.
Typical Wall Assembly for a Traditional Sauna in a Framed Basement Room
|
Layer |
Material |
Notes |
|
Exterior |
Concrete or CMU block foundation |
Existing structure |
|
Framing |
2x4 or 2x6 studs |
16 inches on center is typical |
|
Insulation |
Unfaced mineral wool insulation |
R-13 walls, R-19 to R-30 ceilings |
|
Vapor barrier |
Continuous aluminum foil |
Warm side, all seams sealed |
|
Interior finish |
5/8 inch cedar or hemlock tongue-and-groove |
Breathable wood surface |
Prefabricated Home Sauna infrared cabins generally include their own insulated, self-contained wall systems with R-10 or higher insulated panels. However, the adjacent framed walls in your basement wellness zone still need appropriate moisture protection to prevent moisture-related problems at the interfaces.
Local building codes (IRC R316 and regional amendments) mandate warm-side vapor retarders in cold climates. In mixed-humid zones (IECC Zones 4 to 5), careful consideration is needed to prevent moisture from being trapped within wall assemblies. Check with your local building department for specific requirements in your area.
Installing the Sauna Vapor Barrier Correctly
Proper installation of aluminum foil barriers prevents moisture from reaching the insulation and framing behind your sauna walls. Even small gaps can allow enough vapor transmission to cause problems over the years of use.
Installation requirements:
● Position the aluminum foil with the shiny side facing the sauna interior, directly behind the interior wood cladding
● Cover all sauna walls and ceiling continuously. The vapor barrier must envelope the entire hot room
● Overlap seams by at least 2 to 4 inches
● Seal all joints using high-temperature foil tape rated for 200 degrees F or higher (3M 433 or equivalent)
Sealing critical penetrations:
● Carefully detail around recessed lighting boxes with appropriate fire-rated materials
● Seal heater junction boxes completely
● Maintain continuity at vent openings using flexible foil connections
● Pay special attention to door frames where movement can compromise seals
Avoiding double vapor barrier problems:
● Do not install an additional plastic vapor barrier on the cold side of the same wall
● Double barriers trap condensation between layers during seasonal temperature swings
● This trapped moisture causes hidden mold and insulation degradation
● In basements with existing polyethylene ground covers on concrete, ensure proper assembly sequencing
For infrared cabins operating at lower peak temperatures (120 to 150 degrees F), similar foil barrier strategies still improve energy efficiency and protect framing. While the moisture load from infrared saunas is smaller than steam-heavy traditional saunas, the barrier provides valuable insurance against humidity migration.
What Insulation Works Best for Basement Sauna Walls and Ceilings?
The insulation you select affects fire safety, moisture tolerance, and thermal performance. Not all insulation materials perform equally in the demanding environment of a personal sauna.
Recommended: Mineral wool batts (Rockwool or similar):
● Handle moisture exposure better than fiberglass, maintaining R-value even if slightly damp
● Non-combustible at sauna temperatures, which is a critical safety advantage
● Allow some vapor transmission while providing excellent thermal resistance
● Dense enough to stay in place without settling over time
R-value targets for North American basements:
● Sauna walls: R-13 to R-19
● Sauna ceilings: R-19 to R-30 (especially important when the ceiling is beneath main-level living spaces)
● Higher R-values reduce heat loss and improve even heat distribution inside the sauna
Materials to avoid:
● Exposed foam plastic insulation inside the sauna envelope can soften or off-gas under high heat
● Unless specifically rated for sauna use and detailed behind non-combustible layers, foam products pose risks
● Standard fiberglass-faced batts have paper or Kraft facing that can char or create vapor barrier conflicts
Special attention areas:
● Ceiling insulation above the basement saunas protects finishes in rooms above and limits heat transfer
● In homes built before 1980, evaluate and air-seal rim joists and sill areas near the sauna before construction
● These hidden cold spots create condensation risks that proper insulation addresses proactively
How Do You Manage Humidity in the Wider Basement?
Even a perfectly sealed sauna structure will introduce some moisture into the surrounding basement over time. Every time you open the sauna door, humid air escapes. User traffic, towels, and the natural cooling process all contribute moisture to the wider space.
Your goal is to maintain basement relative humidity in the 40 to 50 percent range year-round. This level feels comfortable for most people, protects stored belongings, and creates conditions unfavorable for mold growth (which thrives at RH above 60 percent).
An integrated approach works best: a properly sized dehumidifier handles baseline humidity, a timed exhaust fan removes moisture spikes, and encouraging air mixing between the sauna area and the rest of the home prevents stagnation.
Home Sauna customers often create dedicated wellness zones that combine a sauna, a cold plunge, and workout equipment. All these features benefit from the same dehumidification strategy.
How Do You Select and Place a Basement Dehumidifier?
Dehumidifier sizing depends on your total basement square footage, usage patterns, and climate. Undersizing leads to perpetually damp conditions; oversizing wastes energy.
Sizing guidelines:
● For a 1,000 to 1,500 square foot basement with a sauna used 3 to 5 times per week, select a 50 to 70 pint per day Energy Star unit
● Examples include Frigidaire FFAD5033W1 or similar models rated for your space
● Each sauna session may require removing 5 to 10 pints of moisture, depending on sauna type and session length
● Very humid climates or larger basements may need whole-house or ducted dehumidification integrated with HVAC
Optimal settings:
● Set the unit to maintain 45 to 50 percent RH with automatic cycling
● Use continuous drainage routed to a floor drain or condensate pump. Manually emptied buckets inevitably get forgotten
● Run the dehumidifier year-round in humid regions (Mid-Atlantic, Southeast, Pacific Northwest)
● In drier climates, operate seasonally based on measured RH readings
Placement considerations:
● Position near the wellness zone but not directly in the sauna's hot airstream
● Maintain at least 12 inches of clearance on all sides for proper air intake and exhaust
● Ensure electrical circuits can handle the dehumidifier's amperage requirements
● Consider noise levels if the sauna area doubles as a relaxation space
How Do Exhaust Fans and Strategic Airflow Help?
Mechanical exhaust removes moisture-laden air directly from your wellness zone before it disperses throughout the basement. Combined with dehumidification, this provides a rapid response to humidity spikes.
Exhaust fan specifications:
● Install a quiet, high-quality exhaust fan rated 80 to 150 CFM (Panasonic WhisperFit or similar, under 1 sone)
● Duct to the exterior using insulated smooth metal ductwork
● Terminate with a weatherproof hood that prevents back drafting
Control options:
● Countdown timer switches (30 to 60 minutes) let users run the fan after each session without remembering to turn it off
● Humidity-sensing controls (trigger at 55 percent RH) provide automatic operation
● Either approach prevents continuous running, which wastes conditioned air
Encouraging natural air mixing:
● Design the wellness room so that fresh air can enter from the main house
● Keep doors open after sessions when practical
● Install transfer grilles (8x12 inches, approximately 100 square inches free area) above doors to equalize pressure
● Allow dry air from the home to mix with humid air in the sauna space
Tight home considerations:
● Homes built after 2015 often feature air-sealed construction under 3 ACH50
● Adding a large traditional sauna may warrant a dedicated fresh air intake
● Integration with a balanced HRV or ERV system recovers 70 percent of energy while providing ventilation
What Flooring, Drains, and Finishes Work Around a Basement Sauna?
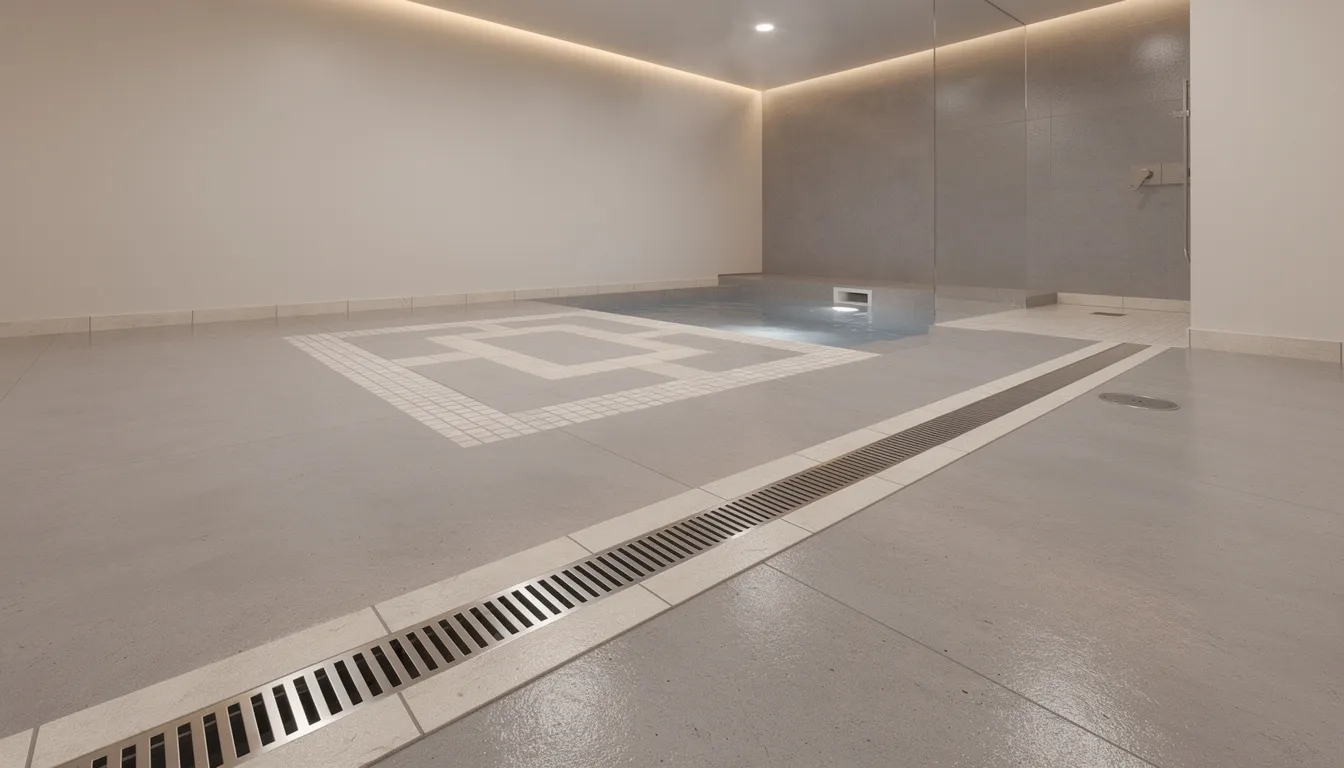
Most basement moisture complaints around saunas start at the floor. Standing water from sweat, water buckets, and cold-plunge overflow can migrate into carpet, subfloor, and baseboards within hours if surfaces cannot handle it.
Your goal is to create a continuous, non-absorbent, non-slip surface from the sauna threshold into the immediate wellness area. Where water is expected (near showers, cold plunges, or traditional sauna areas with water features), drainage pathways must direct water safely away.
What Are the Best Flooring Options Around Basement Saunas?
The sauna floor and surrounding area require materials that will not absorb moisture, will not become slippery when wet, and will not deteriorate under repeated exposure to heat and humidity.
|
Flooring Type |
Benefits |
Considerations |
|
Sealed concrete slab (epoxy coating) |
Extremely durable, seamless, and easy to clean |
Requires proper preparation, can be cold underfoot |
|
Ceramic or porcelain tile |
Water-resistant, many design options, and non-slip options available |
Requires moisture-tolerant adhesive and grout |
|
Luxury vinyl tile (LVT) |
Warm underfoot, water-resistant, and commercial-grade available |
Select a 20 mil or higher wear layer for durability |
Materials to avoid within 3 to 4 feet of the sauna door:
● Carpet absorbs moisture and harbors mold
● Solid hardwood warps and cups with humidity changes
● Standard laminate delaminates when moisture penetrates the seams
● Cork may work in dry areas, but not near water sources
Enhancing comfort and drying:
● Use removable duckboards or modular wooden grates (1-inch cedar slats) inside the sauna and immediately outside the door
● These provide warmth underfoot and allow air circulation for rapid drying between sessions
● Prop the duckboards upright after use to dry completely
Drainage requirements:
● If a shower or cold plunge will be nearby, slope the floor at 1 to 2 percent (1/4 inch per foot) toward a floor drain
● Have licensed plumbers install correctly trapped and vented drains (4-inch PVC with trap per IPC P2701)
● Where no drain exists, commit to practical routines: absorbent mats that hang to dry after use, wiping visible water from sealed surfaces immediately
What Moisture-Resistant Walls and Trim Work Near a Basement Sauna?
Wall and ceiling surfaces near your sauna are subject to conditions different from those of typical basement finishes. Standard drywall and wood trim can fail within a few years without appropriate material selection.
Wall surface recommendations:
● Use cement board (Durock or similar, 1/2 inch) for walls receiving direct splashes from cold plunges or showers
● Moisture-resistant drywall (mold-resistant gypsum) works for adjacent areas with elevated humidity but no direct water contact
● Finish with high-quality, low-VOC paint rated for high-humidity environments
Trim and baseboard materials:
● PVC or composite baseboards resist swelling and paint failure in the immediate sauna and cold plunge zone, approximately 5 times better moisture resistance than MDF at 90 percent RH
● Standard MDF or wood baseboards will swell, delaminate, and require replacement within 2 to 3 years
● If using wood trim near the sauna entry, back-prime all surfaces and caulk joints to reduce moisture migration
Protecting other items:
● Keep artwork and electronics several feet away from the sauna door
● Store soft furnishings (cushions, yoga mats, towels) outside the high-humidity zone
● Position red light therapy panels and other electronic wellness equipment where humidity levels remain moderate
● Use ventilated storage shelves rather than closed cabinets near the sauna
What Operational Habits Keep Basement Sauna Moisture Under Control?
Even the best-designed basement sauna can develop moisture problems if users skip simple post-session habits. The difference between a problem-free installation and one requiring expensive repairs often comes down to consistent routines.
Routine airing out, quick wipe-downs, and periodic inspections keep a sauna installed today in like-new condition for decades. These practices take only minutes but compound into significant protection over time.
Home Sauna owners should follow both the product manual and these general moisture management practices for optimal longevity of their personal wellness retreat.
Post-Session Venting and Drying Routine
Develop habits that remove moisture while surfaces are still warm and before humidity disperses throughout the basement.
Immediately after each session:
● Open the sauna door for 10 to 20 minutes to allow warm air to escape into the well-ventilated wellness room
● Run the room exhaust fan and ensure the dehumidifier is operating
● Sauna temperatures drop naturally while moisture vents out. This 20 to 30-point RH drop happens quickly with doors open
Wipe down surfaces:
● Use a clean towel to remove surface moisture and sweat from benches and backrests
● Wipe floor duckboards, then prop them upright so air circulates underneath
● Pay attention to corners and joints where water pools
Manage towels and accessories:
● Dry towels and bathrobes in a separate, better-ventilated room rather than hanging permanently in the sauna area
● Do not store damp buckets, ladles, or cold plunge covers directly against walls or on porous surfaces
● Create a ventilated storage shelf or hook system for accessories that need to dry between uses
Regular Inspections for Early Signs of Moisture Problems
Catching issues early prevents expensive repairs. Schedule brief inspections quarterly, with more thorough annual checks.
Quarterly visual inspection checklist:
● Look for cupping or darkening of wood trim near the sauna door
● Check for peeling paint on adjacent walls or the ceiling
● Examine grout lines for discoloration or soft spots
● Note any persistent musty odor near the sauna entrance
Annual detailed inspection:
● With the power off, remove the heater guards and inspect behind them
● Check under the benches for mold or moisture staining
● Examine floor penetrations where drains or electrical conduits pass through
● Inspect baseboards adjacent to the sauna door, pulling back any carpet edges nearby
Tracking conditions over time:
● Keep a log of humidity readings from hygrometers placed in both the wellness room and the wider basement
● Note if RH regularly exceeds 55 to 60 percent despite dehumidification
● Track any changes in readings over seasons. This reveals whether systems are keeping pace with moisture loads
When to seek professional help:
● Contact a qualified contractor or building scientist if moisture issues appear repeatedly despite good ventilation and operational habits
● Persistent problems may indicate underlying foundation or building envelope issues
● Early professional assessment prevents structural damage
Sauna-Specific Care That Supports Moisture Control
The sauna itself requires maintenance that directly supports moisture management. Neglected equipment compromises airflow and traps humidity.
Maintain hardware and seals:
● Replace worn sauna door gaskets every 1 to 2 years or when gaps appear
● Keep sauna vents free of lint, dust, and debris. Blockage can reduce airflow by 50 percent
● Periodically tighten hardware on doors and vents to maintain proper closure
● Check glass door panels for seal integrity
Wood surface care:
● Interior sauna wood surfaces should remain unpainted and unvarnished
● Unsealed wood breathes and dries quickly between uses (cedar maintains 8 to 12 percent moisture content naturally)
● Stains or sealants trap moisture and promote surface discoloration
● Light sand heavily used bench areas every 1 to 2 years to remove sweat stains and open wood grain
Equipment-specific guidance:
● Consult your Home Sauna model manual for cleaning solutions compatible with heaters, glass, and control panels
● Avoid products that leave residue, attracting moisture, or promoting mildew
● Traditional sauna users should clean sauna stones annually and check electric heaters for scale buildup
How Does Home Sauna Support Safe Basement Installations?
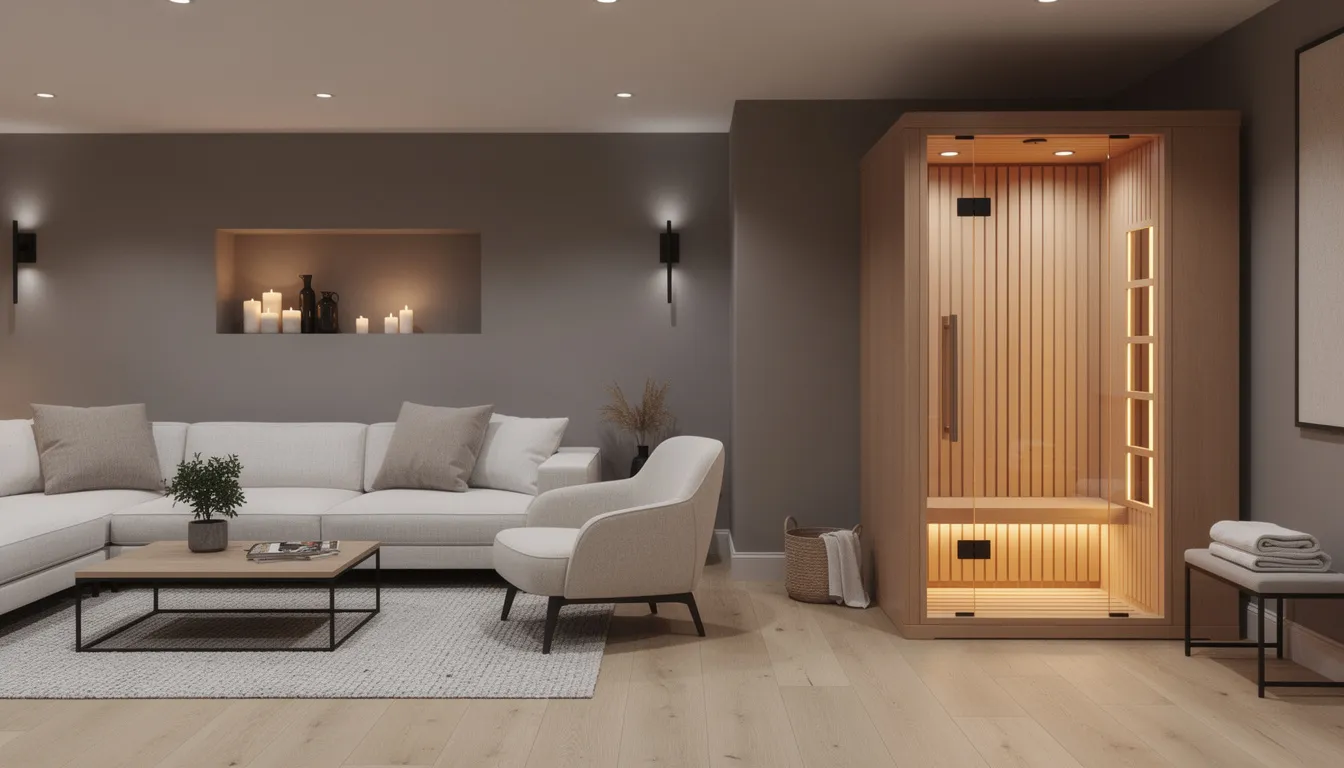
Home Sauna is a premium home wellness brand specializing in infrared, full-spectrum infrared, and traditional saunas designed for residential use. Their product line includes home saunas specifically engineered for basements and interior spa suites where moisture control matters most.
Modular design advantages:
● Many Home Sauna indoor cabins feature modular construction, allowing sections to be carried down typical stairwells
● Assembly in tight basement spaces requires no major demolition
● DIY home sauna installation becomes practical for homeowners with basic tools
● Professional installation services are also available for a turnkey setup
Features supporting moisture-safe basement installation:
● Low-EMF heating systems minimize electrical interference while providing consistent heat
● Precise digital controls allow accurate sauna temperature management
● Efficient insulation keeps heat inside the cabin, reducing moisture load on surrounding spaces
● Integrated vent designs simplify air management without custom ductwork
Planning support available:
● The Home Sauna team reviews room dimensions, ceiling height, and electrical capacity for each customer
● Recommendations account for specific basement layouts and access challenges
● Models and configurations are matched to minimize construction while meeting ventilation and moisture-control best practices
Whether you are creating a complete wellness zone with cold plunge and workout equipment, or simply want a personal sauna for daily recovery, the right equipment makes basement installation far more straightforward.
Install Your Basement Sauna with Professional Standards
A successful basement sauna installation requires careful attention to ventilation and moisture control to prevent mold, structural damage, and poor air quality. Proper vapor barriers, dedicated exhaust systems, and moisture-resistant materials transform your basement into a safe, functional wellness space that enhances your home value rather than creating future problems.
While DIY installation is possible for experienced homeowners, professional guidance ensures your ventilation design meets code requirements and protects your investment in the long term. Understanding the critical differences between traditional and infrared sauna moisture management prevents costly mistakes that become apparent only after installation is complete.
Ready to install a basement sauna with confidence and expert support?
Visit Home Sauna today to access detailed installation guides, ventilation specifications, and professional consultation services that ensure your basement sauna project succeeds from planning through final setup. Don't risk moisture damage or ventilation failures when proven installation protocols are available.
FAQs
Will a basement sauna always cause mold problems over time?
A properly designed and operated basement sauna does not cause mold problems. Issues typically arise only when vapor barriers are missing, vents are undersized or blocked, or overall basement humidity stays above 60 percent for extended periods. With correct vapor barrier installation, sufficient exhaust capacity, and a dehumidifier maintaining 40 to 50 percent RH, many homeowners run saunas for 10 to 15 years without any mold in adjacent spaces. The key factors are following installation best practices and maintaining consistent post-session routines that remove moisture before it can accumulate.
Can I tie a basement sauna into my existing HVAC system for ventilation?
Using your home's main return duct to pull air directly from the sauna is not recommended. This approach sends humid, hot air and sauna odors through your entire HVAC system, potentially causing coil freezing, reduced efficiency, and air quality problems throughout the house. However, you can supply conditioned air from the HVAC system into the wellness room, then vent that room separately to the exterior or through a dedicated exhaust path. This keeps sauna moisture localized while still providing fresh air for the space.
Do I need a floor drain under or near the sauna in the basement?
A floor drain is highly recommended for traditional saunas and any setup that includes a shower or cold plunge. The combination of water from loyly, sweat, and cooling activities creates significant water that needs proper drainage. For a small infrared cabin with minimal water use, a drain is not strictly necessary if the floors are moisture-safe, such as sealed concrete or tile. Without a drain, homeowners must commit to wiping up splashes immediately, using removable mats that dry between uses, and monitoring for any water migration under walls or into adjacent flooring.
How big should my dehumidifier be for a basement with a sauna?
Size your dehumidifier for the entire conditioned basement area, not just the sauna room. For basements of 1,000 to 1,500 square feet with moderate sauna usage (2 to 4 sessions per week), select a 50- to 70-pint-per-day Energy Star unit. Follow AHAM guidelines: multiply your area by 10 in humid climates to estimate daily capacity needs. Homeowners in very humid climates or with larger basements may need a whole-house or ducted dehumidifier integrated with their HVAC system, especially if laundry, showers, or a cold plunge are in the basement.
Is an infrared sauna a better choice than a traditional sauna purely for moisture control?
Infrared saunas are generally easier on basement moisture because they produce drier heat and lower overall humidity, typically with a 50 to 70 percent lower moisture load than traditional heating methods with water on stones. This reduces demands on ventilation and dehumidification systems. However, if you prefer the classic Finnish sauna steam experience and can provide proper venting, drainage, and vapor barriers, a traditional sauna can be installed safely in a basement. The choice should balance your desired experience, existing building conditions, and willingness to manage higher moisture loads. Many homeowners find that infrared provides an excellent indoor sauna experience and is easier to install in basement spaces.
References
1. Science Direct – “Psychometrics - An Overview.”
2. Research Gate – “Impact of C02 Concentration on Indoor Air Quality and Correlation with Relative Humidity and Indoor Air Temperature.”
3. Renewell Wellness – “Infrared Vs Steam Sauna: What’s the Difference?”
4. AlFiPa (Aluminum Film Paper) – “Aluminum Foil as Vapor Barrier.”
Spa World Australia – “Steam Sauna Vs Infrared Sauna Comparison.: