
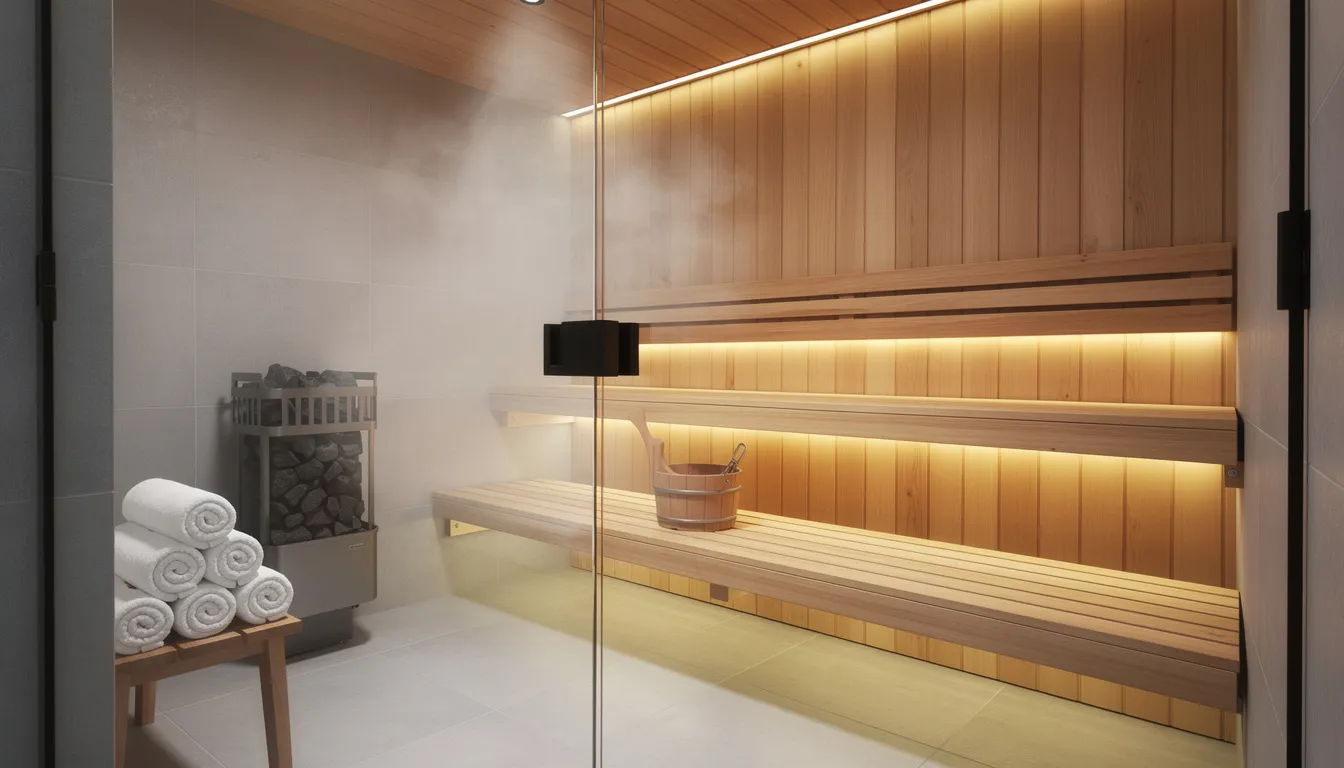
Sauna wood maintenance is fundamentally about moisture control, gentle cleaning, and periodic restoration rather than aggressive chemical treatments. Understanding proper care for your unit ensures decades of reliable home sauna wellness benefits.
The interior wood in your luxury home sauna—including benches, walls, and backrests—should remain unpainted and unvarnished. Clean these surfaces exclusively with pH-neutral, sauna-safe products that won't damage the wood fibers or off-gas harmful fumes when heated.
Key Takeaways
- Your most effective defense against wear and degradation comes from simple habits practiced at every session: shower before entering, always sit on a towel, wipe down the benches with a damp cloth afterwards, and leave the sauna door open until everything is completely dry.
- These small actions prevent most contaminants from ever settling into the wood.
- For HomeSauna owners, the recommended maintenance rhythm includes light cleaning after each use with warm water and a soft brush or cloth, weekly or bi-weekly deeper cleaning with sauna-specific products, and annual sanding and oiling of high-contact surfaces (if manufacturer-approved).
-
This straightforward approach protects your investment in a premium traditional or infrared sauna, keeping it hygienic and visually stunning for 10-20+ years.
Why Does Sauna Wood Need Regular Maintenance?
Your sauna wood exists in one of the most demanding environments in any home. Constant exposure to high heat, humidity, cycling, sweat, and body oils creates conditions that will gradually break down even the highest-quality softwoods if left unaddressed.
Porous sauna woods—including Nordic spruce, hemlock, western red cedar, and aspen—naturally absorb sweat and skin oils during every session. Without regular cleaning, these absorbed substances can lead to dark patches, persistent odors, and a rough, raised wood grain. The problem compounds over time as residues accumulate in the wood fibers.
Temperature and Chemical Effects
Research shows that high temperatures accelerate chemical reactions within the wood surface. Traditional saunas operating between 70-100°C and infrared sauna indoor 2-person cabins running at 45-65°C create conditions where residues from sweat, lotions, and household cleaners can permanently etch or discolor interior surfaces. What might wash off easily at room temperature can become baked in and irreversible in your hot room.
Wood in HomeSauna cabins is selected explicitly for low resin content, dimensional stability, and comfort against bare skin. However, even these premium materials require protection from standing water, mold growth, and abrasion. The natural beauty of your cedar wood or hemlock panels depends on consistent care.
Main Risks of Neglecting Sauna Maintenance
- Musty, unpleasant odors that persist between sessions
- Black spots and mold development in corners and hidden areas
- Splintering benches that become uncomfortable or hazardous
- Significantly shortened service life for premium sauna investments
- Permanent discoloration and staining that cannot be reversed
What Are the Different Sauna Wood Types and How Do They Age?
Understanding how different wood types behave over time helps you anticipate maintenance needs and recognize when surfaces require attention. This buyer's and owner's reference covers the most common woods found in high-end HomeSauna models.
Western Red Cedar Characteristics
- Naturally aromatic with oils that provide rot resistance
- Slowly darkens to a warm amber patina over years of use
- Shows sweat stains as grey or dark spots if not wiped and sanded periodically
- Requires less frequent deep cleaning than lighter woods due to natural oils
- Cedar sauna benches maintain their fragrance longer when properly ventilated
Nordic Spruce and Hemlock Characteristics
- Lighter in natural color, showing dirt and scuffs more visibly
- Prone to developing a patchy, uneven appearance without weekly cleaning
- Benefits significantly from annual light sanding to maintain a consistent color
- More affordable option that rewards diligent maintenance with long life
- Absorbs moisture more readily than cedar, requiring thorough drying
Thermally Modified Woods
- Often used in outdoor infrared sauna installations for enhanced stability
- More resistant to moisture absorption and dimensional changes
- Will silver and grey outdoors without UV protection
- Interior surfaces still benefit from the same cleaning routine as untreated wood
- Maintains structural integrity in more demanding environmental conditions
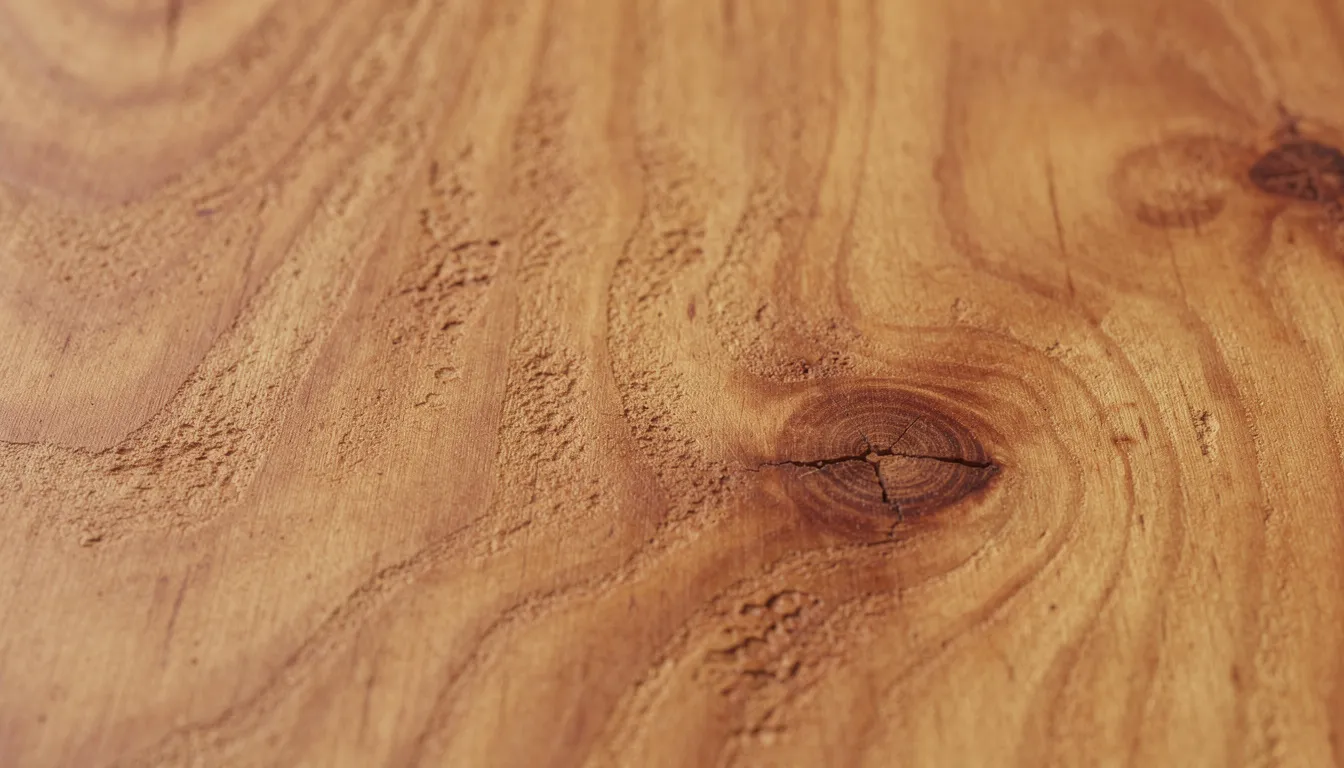
A gradual, even golden darkening (patina) across your wooden surfaces is entirely normal and actually adds character. What you want to prevent are isolated dark blotches, fuzzy raised fibers, and rough, splintered areas—these indicate accumulated contamination or moisture damage.
What Should You Do for Everyday Sauna Wood Care?
Daily habits represent the single most significant factor in how long your home sauna wood stays fresh and clean. This is especially true for busy home installations, where contaminants can accumulate rapidly without consistent post-session care.
Pre-Session Preparation
Shower thoroughly before each sauna session. Avoid heavy body oils, lotions, cosmetics, and self-tanner, which transfer directly to the wood surface and bake into the grain under heat. This simple habit prevents most contaminants from ever reaching your sauna timber.
Strict Towel Protocol
Always sit and lie on large, absorbent cotton towels that fully cover the cedar sauna benches and backrests. For families sharing a 2-3-person home sauna, consider assigning individual "sauna towels" that get washed after each use. Seat covers provide additional protection for high-use installations.
"While Still Warm" Wipe-Down Routine
Immediately after your sauna session, use a soft, damp cloth with clean, warm water to wipe down benches, backrests, and door handles. This quick attention takes less than two minutes but removes sweat residue before it can penetrate the wood surface and set as permanent stains.
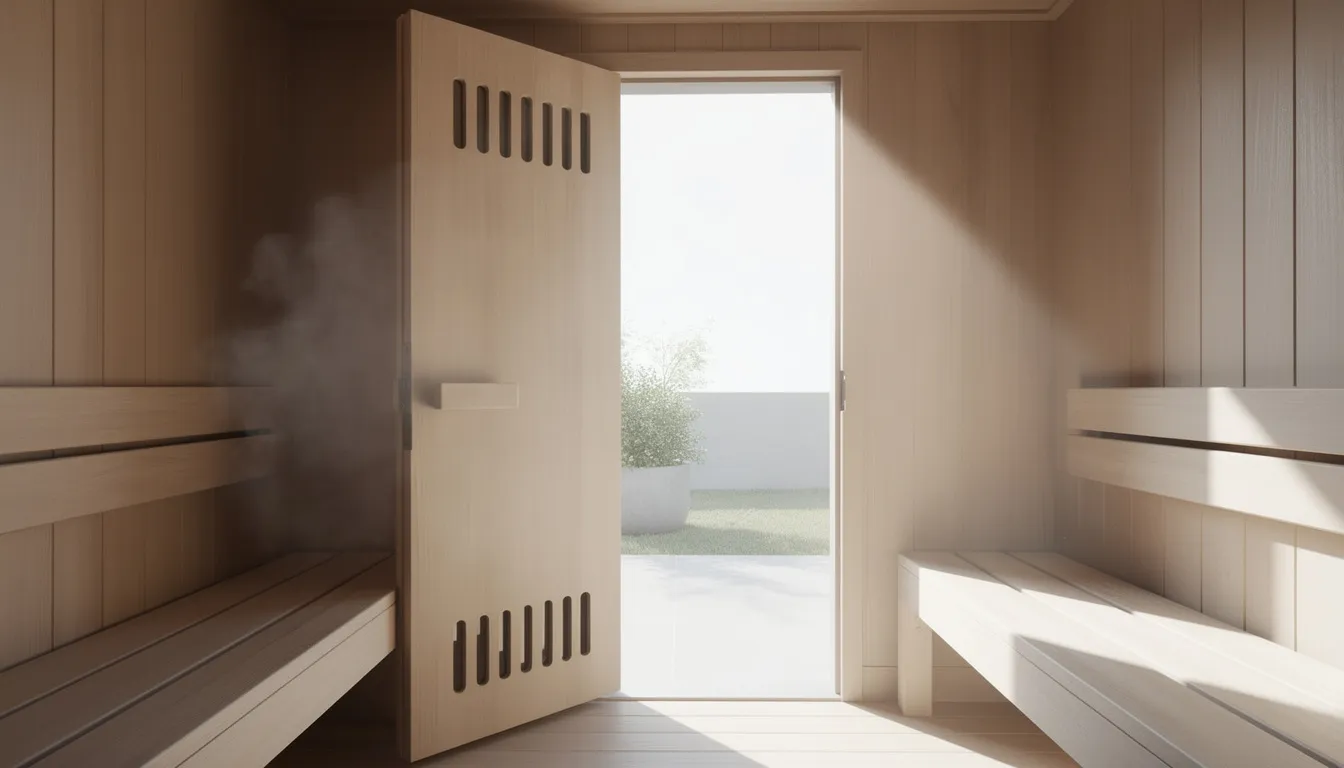
Optimal Ventilation Procedure
After each session, leave the sauna door open and prop it fully. Open all vents and use a fan or window in the adjacent room to promote air circulation until all surfaces are dry to the touch. This typically takes 30-90 minutes, depending on your sauna room location and ambient humidity.
For wet sessions or transitions from cold plunge use, give the floor duckboards or mat a quick water-only wipe to prevent grime from tracking into the wood and ensuring proper ventilation after every use is the most effective mold prevention strategy available.
What Is the Weekly-to-Monthly Cleaning Routine?
This core maintenance routine is designed for HomeSauna owners whose units are used regularly—typically 1-4 sessions per week. Budget 30-45 minutes for a thorough cleaning to keep your sauna fresh and hygienic.
Step-by-Step Cleaning Process
- Allow the sauna to cool completely before beginning
- Remove all towels, accessories, and duckboards
- Vacuum floors, bench joints, and corners using a soft brush attachment to remove loose dirt and debris
- Dilute a pH-neutral, sauna-specific wood cleaner in warm water according to label directions (look for "for sauna/interior softwood" wording)
- Apply cleaning solution with a damp cloth—wrung out so it's moist but not dripping
- Allow the solution to sit on wooden surfaces for 2-3 minutes to break down oils, sweat residues, and bacteria
- Using a soft brush or medium-soft nylon brush, lightly scrub benches, backrests, and wall panels that receive the most sweat contact
- Always scrub along the grain using gentle, circular motions—avoid aggressive scrubbing that damages wood fibers
- Rinse with clean warm water using a fresh cloth (keep it damp, not soaking)
- Change rinse water frequently to prevent redistributing dirt
- Dry excess moisture immediately with a microfiber towel
- Open all vents, prop the door open, and run the sauna heater at a moderate temperature (60-70°C) for 30-45 minutes to evaporate moisture that penetrated the wood surface
Recommended Frequency Guidelines
|
Usage Level |
Recommended Cleaning Frequency |
|
Heavy (3-5 sessions/week) |
Weekly thorough cleaning |
|
Moderate (1-2 sessions/week) |
Every 2-3 weeks |
|
Light (occasional use) |
Monthly or as needed |
Adjust your schedule if visible darkening or odor appears sooner than expected. Areas around natural oils from skin contact typically show wear first.
How Do You Deep Clean and Restore Sauna Wood?
Deep cleaning becomes necessary when regular maintenance isn't enough to keep your sauna wood looking its best. Signs include visible sweat stains that don't wipe away, rough texture, black specks, or a lingering musty smell that persists despite proper ventilation.
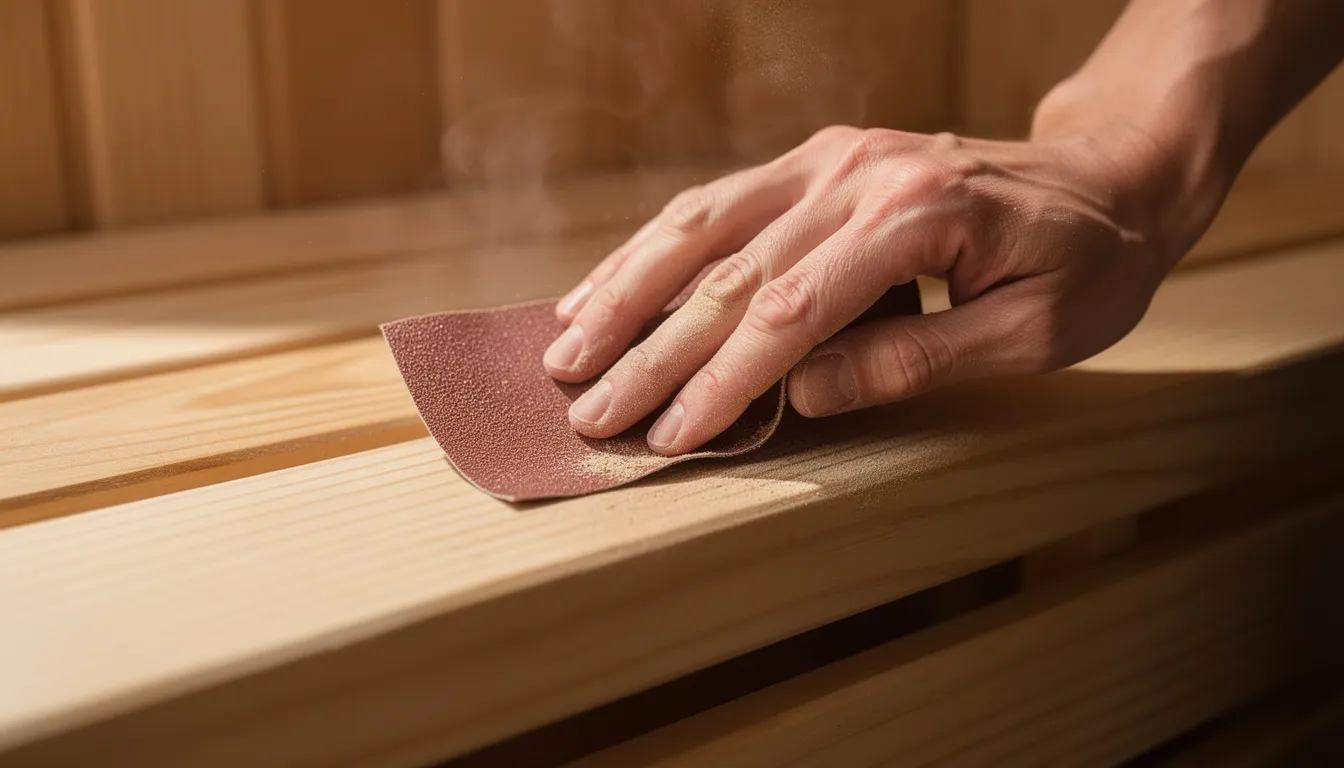
Sanding as the Primary Restoration Method
Light sanding is an effective way to remove sweat stains and restore sauna benches to like-new condition. Use fine-grit sandpaper (150-180 grit) and always sand with the grain, never against it. Focus your efforts on benches, backrests, and floorboards in high-traffic areas where skin contact is most frequent.
Safety and Technique Guidelines
- Wear a dust mask to avoid inhaling wood particles
- Vacuum dust thoroughly after sanding
- Avoid aggressive sanding that removes too much material
- Work in thin passes rather than applying heavy pressure
- Check your progress frequently to prevent uneven surfaces
Tackling Stubborn Stains Before Sanding
For persistent stains, try spot-cleaning first with sauna-specific cleaner or a mild baking soda paste applied with a damp cloth. Test on a small, inconspicuous area before treating visible surfaces. This approach can remove many stains without requiring sanding.
Post-Deep Cleaning Protocol
After completing the deep clean and sanding:
- Wipe all surfaces with a slightly damp cloth to remove remaining dust
- Allow wood to dry completely—ideally overnight with good air circulation
- Optionally apply a breathable wood preservative or penetrating oil (covered in detail below)
- Run the sauna heater briefly to ensure complete drying before the next session
Consider taking before-and-after photos once per year to track the condition of your sauna benches and evaluate the effectiveness of your maintenance routine.
What Products Are Safe and Unsafe for Sauna Wood?
Not all cleaners labeled "wood-safe" are appropriate for the high-heat, high-humidity environment of your infrared sauna 1-person or larger unit. Products that perform well on furniture or flooring can cause severe damage when exposed to sauna conditions.
Safe Product Characteristics
- pH-neutral formulation
- Chlorine-free and ammonia-free
- No wax or silicone that creates buildup
- Specifically labeled for interior saunas or untreated softwood benches
- Low-VOC or no-VOC formulations
- Designed for porous wood applications
For most HomeSauna interiors, a mild cleaning solution of sauna cleaner diluted in warm water is effective for routine cleaning. Strong disinfectants are unnecessary because regular heat cycles, combined with thorough drying, naturally limit microbial growth, according to a ResearchGate study.
Products and Methods to Avoid
|
Avoid |
Reason |
|
Bleach sprays |
Discolors and damages wood fibers permanently |
|
Bathroom cleaners |
Often contain harsh chemicals that etch surfaces |
|
Strong degreasers |
Strip natural oils from cedar products |
|
Furniture polish |
Creates a slick buildup that becomes dangerously slippery when heated |
|
Varnish or polyurethane |
Prevents wood from breathing, traps moisture, and off-gasses toxic fumes |
|
Pressure washers |
Destroy wood structures and can cause permanent damage |
|
Household cleaners |
Often contain ammonia or other ingredients that are unsafe for heated environments |
Natural Alternatives for Occasional Use
Lightly diluted white vinegar (1:1 with water) or mild soap can work for localized stains, but don't use these as daily cleaners on delicate cedar or spruce. Essential oils should never be applied directly to wooden components—add them only to water used on traditional sauna stones.
Always check your HomeSauna owner's manual before using new products, and confirm compatibility with your specific model's warranty guidelines.
What Protective Treatments Work for Sauna Wood?
Interior sauna wood must remain breathable. Any treatment you apply should never form a glossy, plastic-like film that traps moisture or becomes slippery when surfaces are hot. The goal is protection that enhances rather than seals.
Suitable Protective Products
Breathable oils, such as sauna-grade paraffin oil or other manufacturer-approved penetrating oils, work well on high-contact surfaces like benches and backrests. These products soak into the wood fiber rather than sitting on its surface, maintaining the wood's ability to absorb and slowly release heat and humidity. Ceilings and wall panels typically don't require treatment.
Application Procedure
- Begin only with freshly cleaned wood that has dried completely (wait at least 24 hours after deep cleaning)
- Apply a skinny coat using a lint-free cloth
- Work along the grain in smooth, even strokes
- Allow oil to penetrate for 20-60 minutes
- Wipe off all excess with a clean, dry cloth
- Let the sauna remain unused for 24 hours to allow proper curing
Expected Results from Paraffin Oil Treatment
- Slightly deeper, richer color that enhances natural beauty
- Easier routine cleaning as surfaces become less porous
- Reduced sweat absorption into wood fibers
- Improved resistance to dark stains and discoloration
- Extended time between deep cleaning requirements
Recommended Treatment Intervals
|
Installation Type |
Treatment Frequency |
|
Home use (moderate) |
Once per year |
|
Heavy home use |
Twice per year |
|
Commercial-style installations |
Quarterly (thin coats only) |
Never apply protective treatments to walking surfaces where they could become slick. Benches and backrests may be oiled, but floors and step edges should remain matte and grippy for safety.
How Do You Prevent Mold, Mildew, and Odor?
Mold development and musty smells are almost always symptoms of poor ventilation, standing moisture, or heavy soiling from sweat and dirty feet. Prevention is far easier than remediation for your full-spectrum infrared sauna for sale or traditional unit.
Essential Ventilation Habits
After every session, keep the door and vents open until all surfaces are fully dry. This is especially critical after back-to-back sessions or in humid climates, where excess humidity lingers in the sauna room. Fresh air circulation is your primary defense against mold.
Regular Inspection of Hidden Zones
Check these areas frequently for signs of moisture accumulation:
- Under benches and behind backrests
- Beneath duckboards and floor mats
- Corners around the sauna heater
- Behind any removable panels
- Along the base of the wall panels near the floor
Response Plan for Early Mold Spots
- Scrub affected areas with sauna-safe cleaner or mild vinegar solution (1:1 ratio with water) using a soft brush
- Allow the solution to sit for up to one hour on visible spots
- Rinse sparingly with clean water
- Fully dry with heat and strong airflow
- Monitor the treated area closely over the following weeks for recurrence
Address Underlying Issues
If mold keeps returning, investigate root causes:
- Blocked or insufficient vents
- Water leaks from adjacent showers or plumbing
- Floor mats that never dry completely between uses
- Excess water on floors from cold plunge transitions
- Inadequate ventilation in the surrounding room
If black mold covers large areas or recurs quickly despite proper treatment, consult a professional for remediation. Established mold that penetrates deeply into timber cannot be eliminated by surface cleaning alone—affected sections of wood may require replacement, according to the U.S. Environmental Protection Agency guidelines.
What Are Special Considerations for Different Sauna Types?
Both sauna types use similar woods and share core maintenance principles, but key operational differences affect how you approach care. Understanding these nuances ensures your specific HomeSauna model receives appropriate attention.
Infrared Sauna Considerations
Infrared cabins operate at lower temperatures (45-65°C) and often have more frequent, longer sessions than traditional installations. The wood still absorbs sweat and body oils despite reduced humidity, so the same towel use, pre-shower requirements, and wipe-down protocols apply entirely.
Be especially mindful of residues from body lotions, cosmetics, and hair products in infrared saunas. Lower temperatures may not "burn off" odors the way a hot room does, but they can still bake these substances into bench surfaces over time, creating persistent stains and smells.
Home Sauna’s infrared units often feature precise panel placements and integrated electronics within walls. Avoid over-wetting these areas during cleaning, and always follow the manufacturer's guidelines for heaters and control panels to prevent damage.
Traditional Sauna Considerations
Traditional (Finnish) saunas with water poured onto the heater stones expose the wood to steam bursts and occasional splashes of water. This creates additional moisture stress on floors and lower walls, demanding closer inspection for darkening, swelling, or soft spots.
Check sauna stones annually for cracks or deterioration. When inspecting the stone's structure, remove it from the heater and use a hand vacuum to clear stone chips and debris from the heater cavity. Rinse reusable rocks and let them dry completely before replacement.
Monitor the area around your sauna heater for scorching or dark halos on nearby wooden surfaces—this indicates the heater may be positioned too close to combustible materials or operating beyond recommended temperatures, creating a potential fire hazard.
What Does a Seasonal and Annual Maintenance Checklist Include?
This once- or twice-yearly ritual preserves your luxury home sauna and catches minor issues before they become structural problems requiring expensive repairs.
Annual Maintenance Tasks
|
Task |
Details |
|
Full interior vacuuming |
Remove all loose dirt from every surface, joint, and corner |
|
Bench inspection |
Remove benches if possible to clean beneath and behind thoroughly |
|
Hardware check |
Inspect for cracks, loose fasteners, and damaged components |
|
Deep clean problem areas |
Focus on corners and high-contact surfaces showing wear |
|
Light sanding |
Use fine-grit sandpaper on worn bench surfaces and backrests |
|
Protective treatment |
Apply paraffin oil or an approved penetrating oil after sanding |
For Outdoor Saunas—Exterior Cladding Inspection
- Check for greying, cracks, and sealant failures
- Look for any moisture intrusion points
- Clean or lightly pressure-wash only the exterior walls if manufacturer specifications allow (never the interior)
- Apply exterior-grade wood treatment if needed for UV protection
Heater and Stone Maintenance
Schedule heater and sauna stones inspection alongside your annual wood care:
- Remove all stones from the heater
- Inspect each stone for cracks or crumbling—replace as needed
- Vacuum stone chips, dust, and debris from the heater cavity
- Check heater guards and nearby wood for scorching
- Rinse reusable stones and allow to dry completely before replacing
Maintenance Documentation
Keep a simple log recording dates, tasks completed, and products used. This documentation:
- Supports warranty claims if issues arise
- Helps you fine-tune maintenance frequency based on actual usage patterns
- Provides a record for future owners if you sell your home
- Tracks which methods work best for your specific wood types
What Daily Habits Keep Sauna Wood Cleaner Longer?
Small, consistent habits can cut your deep-cleaning time in half and keep your best infrared sauna for home looking showroom-fresh for years. Minimal maintenance becomes possible when you prevent contamination rather than treating it.
Essential User Rules
- No outdoor shoes in the sauna—ever
- No food or colored drinks that can spill or stain
- Never sit directly on benches without a towel, especially after workouts
- Avoid heavy perfumes or hair products that off-gas in heat and settle on wood
Pre-Sauna Hygiene Protocol
Take a quick shower with mild, unscented soap before entering. This removes dirt, sweat, and body oils that would otherwise transfer directly to your interior wood surfaces. Showering is the single most effective way to reduce contaminant buildup.
Dedicated Sauna Kit
Keep these best sauna accessories 2026 supplies nearby for quick access:
- Clean towels (enough for everyone using the sauna)
- Soft microfiber cloth for wipe-downs
- Small bucket with diluted sauna-safe cleaning solution
- Hand brush for quick scrubbing if needed
End-of-Session Ritual (2 Minutes)
Finish each session with these quick steps:
- Wipe benches and backrests with a damp cloth
- Check corners and under benches for pooled excess water
- Open all vents fully
- Prop the sauna door open completely
- Ensure adequate air circulation in the surrounding room
This brief routine prevents 90% of maintenance problems before they start.
What HomeSauna Products and Support Are Available?
HomeSauna is committed to helping customers protect their investment in premium traditional and infrared sauna units. Our approach to wood selection and customer support reflects decades of expertise in the wellness industry.
Sustainable Wood Sourcing
HomeSauna selects low-toxicity, sustainably sourced woods, including certified cedar, Canadian hemlock, and Nordic spruce. These materials are chosen specifically for sauna applications—low resin content, minimal off-gassing, and excellent performance under heat stress. They pair perfectly with gentle, sauna-specific cleaners and breathable protective treatments.
Recommended Care Products
When selecting cleaning and treatment products, look for options tested for low VOCs and verified safe for sauna applications. Compatible products include pH-neutral sauna cleaners, penetrating paraffin oils, and microfiber cleaning accessories designed for softwood care.
Model-Specific Guidance
Every HomeSauna model may have unique care requirements based on wood species, construction details, and included features. Before using new cleaning products or methods:
- Consult your HomeSauna owner's manual for specific recommendations
- Contact our customer support team with questions about your model
- Verify product compatibility with your warranty coverage
Continue Your Wellness Journey
Explore our complete range of traditional and infrared saunas and cold plunges to enhance your home wellness setup. Visit HomeSauna for additional guides on heat therapy, recovery protocols, and maximizing your home sauna wellness experience.
FAQs
How often should I sand my sauna benches?
For a typical HomeSauna unit used 2-4 times per week, light sanding of benches and high-contact backrests once per year is usually sufficient. If you notice sweat stains, rough patches, or raised wood grain appearing sooner, spot-sand those specific areas as needed. Always use fine-grit sandpaper (150-180 grit) and work with the grain to avoid creating visible scratches.
Can I seal my sauna walls to make cleaning easier?
Interior walls and ceilings should not be sealed with varnish, polyurethane, or similar finishes. These products trap moisture within the wood, potentially off-gassing harmful fumes when heated, and eventually peel or blister. Only breathable, sauna-approved penetrating products should be used—and typically just on high-contact bench surfaces, not walls or ceilings.
What should I do if my sauna wood turns grey or dull?
First, try a thorough cleaning with sauna-specific products, then lightly sand the wood surface to refresh it. This typically restores the warm color you expect. If the grey is a uniform patina on the exterior cladding of an outdoor infrared sauna, this is purely cosmetic and can be left as-is or restored with specialized exterior wood cleaners and oils if you prefer a richer appearance.
Is it safe to use essential oils directly on the wood?
Essential oils should never be poured directly onto benches, backrests, or wall panels. They leave oily residue that attracts dirt, can darken or soften the wood fiber, and may create sticky spots. Instead, add essential oils only to the water you pour over traditional sauna stones, or use a dedicated sauna diffuser.
How do I maintain sauna wood in a humid climate or a basement installation?
Humid environments require extra attention to ventilation and dehumidification outside the sauna itself. Use an exhaust fan or dehumidifier in the surrounding room, leave the door and vents open longer after each session, and inspect more frequently for condensation in corners, behind benches, and near floor level. Consider running your sauna heater briefly after sessions to accelerate drying, even in an indoor 2-person infrared sauna.
References and Citations
- Science Direct – Thermal Treatment of Wood - An Overview
- ResearchGate – Characterization of Bacterial Community Contaminating the Floor of a Hot and Dry Sauna
- U.S. Environmental Protection Agency – Mold Cleanup in Your Home
- Sun Home Saunas – Preventing Mold in Outdoor Saunas: Ventilation Best Practices
- Aroma Tools – 10 Ways NOT To Use Essential Oils