
Most home sauna owners encounter fixable issues during their sauna's lifetime. Whether you own the best infrared sauna for home or a traditional Finnish unit, understanding basic troubleshooting can save you time and money.
This comprehensive guide addresses power failures, heating problems, moisture buildup, control malfunctions, and electrical issues—most of which you can diagnose at home before calling a technician.
Modern luxury home saunas feature modular components that make repairs easier. With proper maintenance and quick problem identification, your sauna can provide decades of reliable wellness benefits.
Key Takeaways
- Most common sauna problems—power failures, heating issues, moisture buildup, control malfunctions, and electrical problems—can be diagnosed and often fixed at home with simple checks before calling a technician. Many of these common problems, including ventilation issues, can be prevented with proactive care and regular maintenance.
- Traditional saunas should reach operating temperature in 30–45 minutes, while infrared sauna indoor 2-person units warm up in 15–20 minutes; significantly longer times indicate a heating issue worth investigating.
- Prioritizing safety is essential: always disconnect power before touching wiring, the sauna heater, or the electrical panel, and call a licensed electrician for recurring breaker trips or any burning smells to protect the user from electrical hazards.
- The best home sauna brands 2026 models feature low-EMF heaters and modular controls designed for component-level repair, meaning you rarely need to replace an entire unit.
- Consistent post-session drying, proper ventilation, and a basic monthly inspection will prevent most wood deterioration, mold growth, and musty odors before they become serious.
Why Should You Prioritize Safety Before Fixing Your Sauna?
Saunas combine high temperatures, significant moisture, and high-voltage electrical components in a compact space. That combination demands respect. Before you pick up a screwdriver or start poking around inside your unit, prioritize safety to protect yourself from potential hazards, especially when dealing with electrical problems.
Essential Safety Protocols
- Switch off the dedicated breaker (or unplug plug-and-play units) before opening heater covers, control panels, or junction boxes. Never assume power is off just because the display is dark.
- Know your voltage limits. You can safely work on 120V plug-in connections yourself. However, 240V hard-wired circuits—common for larger traditional units with 6kW–9kW heaters—should always be left to a licensed electrician.
- Watch for danger signs that require immediate shutdown: a persistent burning smell, sizzling sounds coming from the wood near electrical work, melted plastic on wiring, or scorched spots on the heater housing.
- Keep documentation handy. Home sauna owners should have their installation manual and wiring diagram accessible for troubleshooting. If anything is unclear, contact brand support before proceeding.
Many common problems can be avoided by following proper safety protocols and promptly addressing electrical issues. The goal is to fix problems efficiently, not create new ones. When in doubt, stop and call a professional.
What Should You Know About Your Sauna Type Before Troubleshooting?
Finnish-style traditional saunas, full-spectrum infrared sauna for sale units, and sauna blankets all fail in different ways. Correct diagnosis starts with knowing your hardware. Understanding the differences helps you apply the right troubleshooting approach for your specific model.
Understanding Different Sauna Technologies
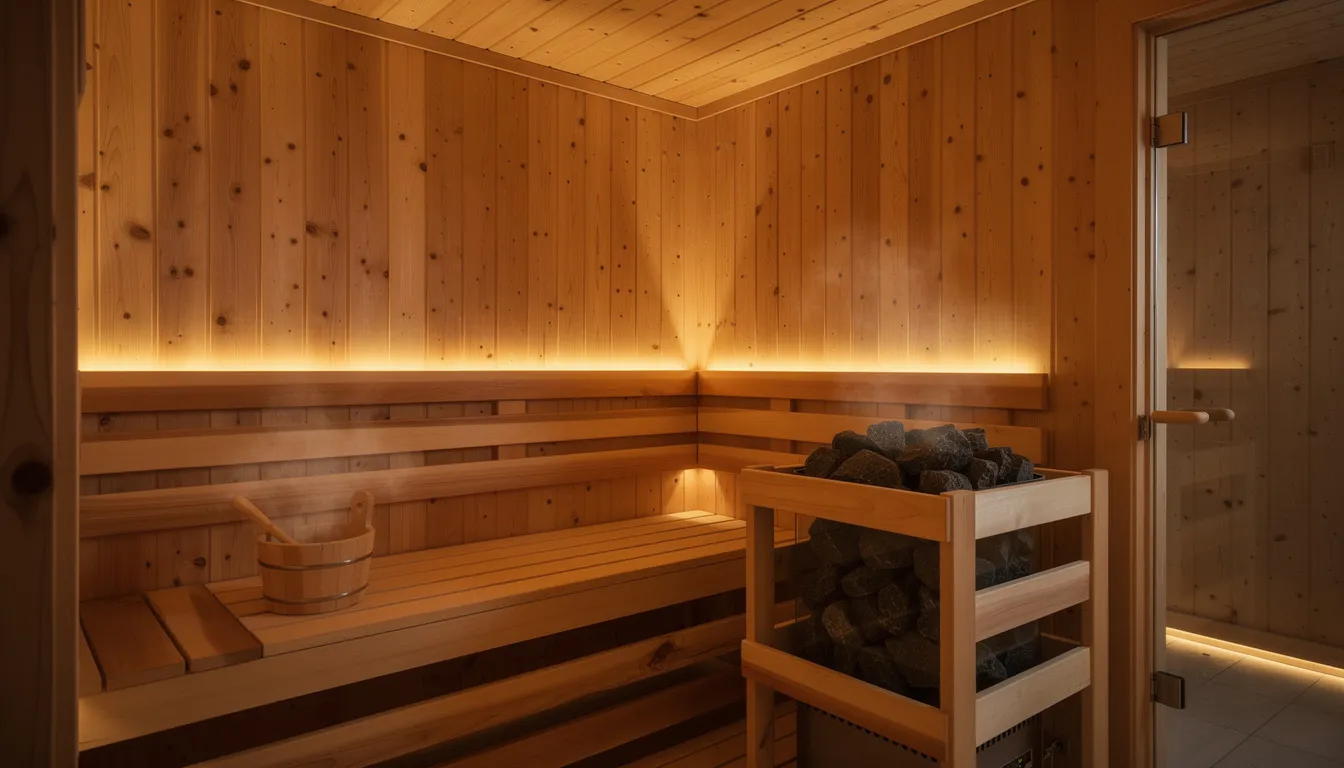
Traditional electric saunas use a rock heater (typically 4.5–9kW) with sauna stones, where you pour water to create steam. Operating temperatures range from 170–195°F (77–90°C), with preheat times around 30–45 minutes.
Infrared and full-spectrum units feature panel heaters mounted on walls (and sometimes the floor). There's no steam from water on hot stones—instead, radiant heat warms your body directly at 120–150°F (49–65°C), with warm-up times of 15–20 minutes. These models deliver infrared sauna health benefits at lower temperatures.
Portable sauna blankets and tents plug into standard 120V outlets, and each has its own controller. Issues typically involve controllers, zippers, or folded heating elements rather than complex electrical systems. An infrared sauna blanket offers convenient wellness benefits with minimal installation.
Home Sauna offers both traditional and low-EMF full-spectrum infrared models.
How Do Traditional and Infrared Saunas Differ in Common Problems?
Understanding what typically goes wrong with each type helps you identify problems faster. The infrared sauna vs traditional sauna comparison reveals distinct maintenance needs and failure patterns that require different diagnostic approaches.
|
Issue Type |
Traditional Saunas |
Infrared Saunas |
|
Heating Problems |
Stone arrangement, element failure, and overheat limiters |
Panel failures, sensor issues, control glitches |
|
Common Maintenance |
Stone inspection, heater guard cleaning |
Panel surface checks, sensor positioning |
|
Moisture Concerns |
Higher humidity, more ventilation needed |
Lower humidity, but still requires airflow |
Type-Specific Maintenance Requirements
Traditional sauna users should regularly inspect stones for cracks, crumbling, or overly tight packing. Misuse, such as constantly dumping water on the heater, can significantly shorten element life.
Infrared sauna users should check for "cold panels" by running the unit for 10–15 minutes and carefully feeling each heater surface for even warmth. A completely cold panel indicates a problem.
Confirm your model details before ordering parts or attempting repairs. For example, a 2021 home infrared sauna installation requires different components than an older, generic import.
Never mix troubleshooting advice between sauna types. Pouring water on an infrared panel or running a traditional heater without stones can cause serious damage.
What Symptoms Indicate Specific Sauna Problems?
Start with what you're experiencing, then move to the relevant section. Many common problems present with these symptoms. This quick reference helps you diagnose issues faster and apply the right solution.
Power Symptoms
- The sauna won't turn on at all
- The lights and display are completely dead
- The breaker trips immediately when starting a sauna session
Heat Symptoms
- Takes over 60 minutes to reach the target temperature
- Never passes 120°F in a traditional unit
- Uneven heat distribution or a "cold wall" in infrared cabins
- Overheating beyond the set point
Moisture/Wood Symptoms
- Bench boards are still wet the next day
- Dark spots are appearing on the cedar
- Musty odors that won't go away
- Visible mold at joints or corners
- Water beading on the ceiling paneling
Control Symptoms
- Frozen display or error messages
- Buttons not responding
- Wi-Fi/app connectivity issues despite the panel lighting up
- Random shutdowns mid-session
How Do You Troubleshoot Power Problems in Your Sauna?
Many "dead sauna" situations trace back to something simple: a tripped outlet, a GFCI reset needed, or a breaker that's flipped. These are all examples of electrical problems, and promptly addressing them, such as power failures, is crucial for both safety and optimal sauna performance. Before calling a technician, work through these straightforward checks that resolve most power issues.
Initial Power Diagnostics
Test the circuit with another device. Plug a lamp or hair dryer into the same outlet to confirm the power source is working.
Check and reset GFCI outlets. Infrared sauna indoor 2-person units and indoor traditional heaters often require dedicated GFCI circuits. The reset button is usually on the outlet face or in your electrical panel.
Inspect the power cord and plug for discoloration, heat damage, or crushed sections. This is especially important for portable units and sauna blankets that get moved frequently.
Note patterns with breaker trips. If the same breaker trips repeatedly in newer installations (2022–2024), you likely have a wiring fault or a failing heater element. This warrants a licensed electrician following the National Fire Protection Association electrical safety codes.
What Should You Do When Your Sauna Is Completely Dead?
When nothing powers up, work through these steps systematically:
- Verify the dedicated breaker in your main panel is fully ON. A breaker that's tripped sits between ON and OFF. Switch it completely OFF, then back ON once.
- Check any in-line disconnect or subpanel near the sauna. Larger 240V traditional heaters often have a local disconnect switch or fuses that may have tripped or blown.
- Inspect visible low-voltage control wires (with power off). Remove the control panel faceplate if your manufacturer allows, and confirm wiring is firmly connected and hasn't been pinched or damaged.
- If nothing works after these checks, the power supply board or main relay may have failed. Contact HomeSauna support with your model and serial number for next steps.
How Do You Fix Control Panel and Switch Issues?
Modern digital sauna controllers (2018–2024) function like small computers and can often be "rebooted" when they misbehave.
Perform a hard reset by turning the unit off at the breaker or unplugging it for 2–5 minutes. This resolves frozen displays and unresponsive keys in roughly 70% of cases.
Check for lock modes. Look for "child lock" or "keypad lock" icons on the display—these can make the panel appear dead even though the system is powered.
Visually inspect connections behind the control panel. Look for loose connectors, moisture-related corrosion, or condensation inside the housing.
If your panel displays error codes like "E1," "LO," or "HI," these typically indicate temperature sensor issues, overheat limit triggers, or communication errors. Consult your manual's code list rather than assuming the display itself has failed.
What Causes Heating Problems in Saunas?
Heating issues are the most common complaints Home Sauna support receives. The unit runs, but the temperature rises slowly or never reaches the set point. Understanding the relationship between infrared sauna price and performance helps set realistic expectations for your investment.
Normal Warm-Up Benchmarks
- Traditional indoor heaters (6kW in a 5'×6' room): 30–45 minutes to reach 175–190°F
- Infrared sauna 1-person cabins: 15–25 minutes to reach 130–140°F
- Infrared sauna indoor 2-person units: 15–25 minutes to reach 130–140°F
To verify whether your thermostat settings are accurate, place an independent thermometer at seating height—not directly above the heater or on the floor. Readings should be within 5–10°F of the displayed temperature.
Factors Affecting Heating Performance
Factors that naturally slow heating include undersized heaters for the room volume, rooms with large glass-heavy fronts, poorly insulated outdoor infrared sauna installations, and extreme cold outside. A weatherproof outdoor infrared sauna in -10°F Minnesota winter will struggle more than an indoor unit.
Heavy users should expect traditional heating elements to last 5-10 years and infrared panels to last much longer, provided proper ventilation and electrical supply are maintained, according to the Sauna Supply Company.
How Do You Fix Slow Heating or Temperature Problems?
Different sauna types require different approaches to heating issues. Here's how to diagnose and resolve temperature problems based on your specific sauna technology.
For Traditional Saunas
With the power off and the heater cool, lift the stone guard and inspect the elements for breaks, discoloration, or visible cracks.
Check the stone arrangement. Collapsed or tightly packed stones choke air circulation and prevent even heat distribution. Remove stones, rinse off mineral deposits and debris, then re-stack with small air gaps. Place larger stones on the bottom, smaller ones on top.
For Infrared Cabins
Run the unit for 15–20 minutes, then carefully feel each panel for warmth. A completely cool panel likely indicates a failed heater or broken connection in your best infrared sauna for home.
Ensure nothing blocks heat output. Towels, backrests, or additional insulation can restrict circulation around panels.
Environmental factors matter too. An outdoor sauna during a cold snap may realistically cap at lower temperatures without heater upgrades or insulation improvements.
What Causes Thermostat and Sensor Troubles?
Inaccurate or drifting temperature readings often stem from sensor problems, not heater failure. Sensor issues account for a significant share of heating complaints and are usually easier to fix than a full heater replacement.
Common Sensor Issues
High-limit sensors in traditional units (usually near the ceiling above the heater) can trip if towels cover them or if poor ventilation creates hot spots. Resetting requires cooling the unit and cycling the power.
Hanging temperature probes in infrared models can get knocked loose, taped to an unexpectedly hot wall, or buried behind trim. Gently confirm proper positioning.
Cross-check with a digital thermometer. A consistent 10–15°F difference between your thermometer and the display suggests the sensor needs recalibration or replacement.
Home sauna owners can reference their model manual for exact sensor locations. Plug-and-play replacement sensors are available if readings remain inaccurate after cleaning and repositioning.
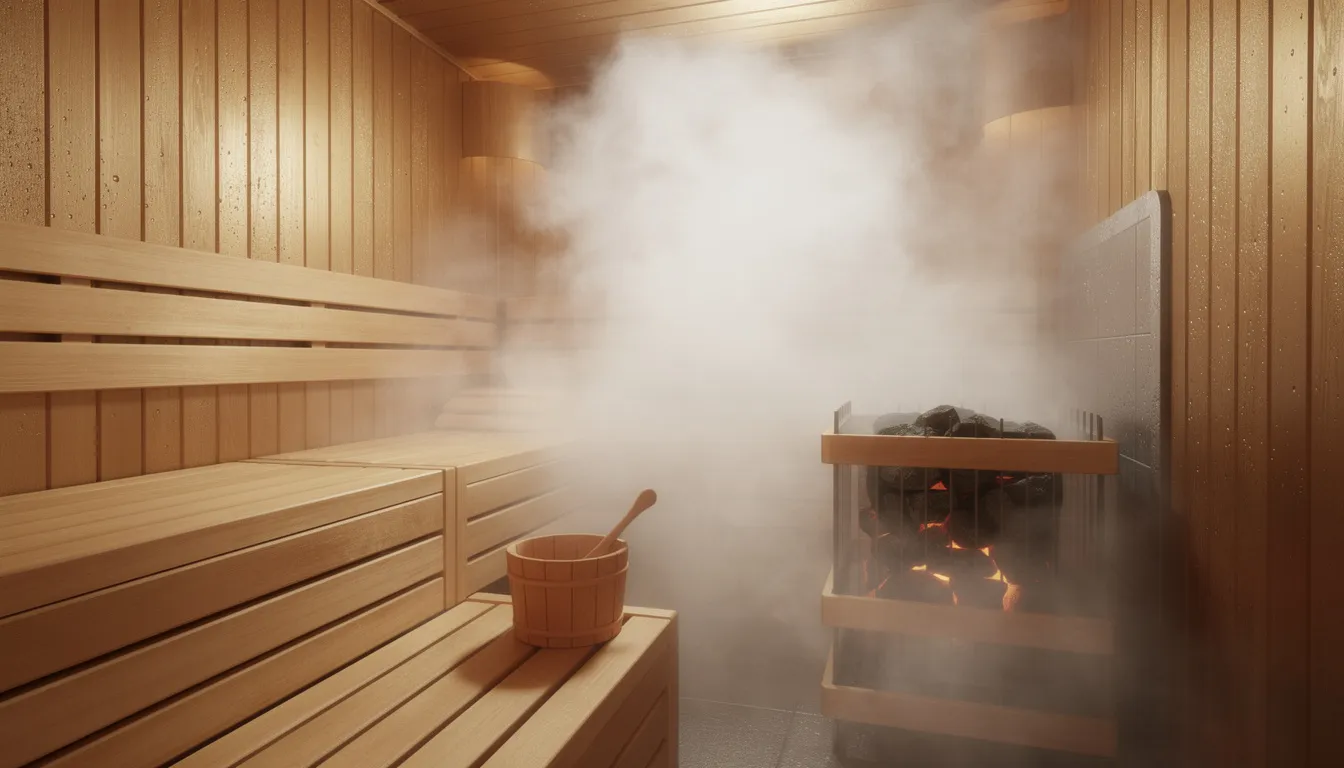
How Do You Troubleshoot Steam Generator Problems?
Steam generator problems can quickly disrupt your sauna experience, leaving you with little or no steam, erratic bursts, or even water leaks. Identifying the root cause requires systematic checking of several components.
Diagnosing Steam Issues
If your steam sauna isn't performing as expected, start by checking the display panel for any error messages—these can provide valuable clues about the underlying issue. Make sure the steam generator is receiving a steady water supply by inspecting the water lines for blockages, leaks, or kinks, and confirm that the fill valve is operating correctly.
A common culprit in steam generator problems is a faulty or dirty water-level sensor. If the sensor is covered in mineral deposits or debris, it may not accurately detect water levels, leading to inconsistent steam production or safety shutdowns. Cleaning or replacing the sensor can often restore normal function.
Additionally, check for any visible signs of water leakage around the steam generator, as this could indicate a failing gasket or loose connection.
When to Replace vs. Repair
When troubleshooting, always prioritize safety—turn off the sauna's power and avoid working on electrical components unless you are qualified. If the steam generator is older or has suffered extensive damage, replacing the entire unit may be the most reliable fix. Addressing steam generator problems promptly ensures your sauna remains a safe, relaxing retreat.
What Steam Generator Maintenance Prevents Problems?
Regular maintenance is essential for preventing steam generator problems and keeping your steam sauna operating at its best. A proactive approach saves money and extends equipment life significantly.
Essential Maintenance Tasks
Begin by routinely cleaning both the exterior and interior of the steam generator to remove dust, debris, and any mineral buildup. Inspect the water supply lines for leaks or blockages, and verify that the fill valve and water level sensor are functioning properly—these components are critical for consistent steam production.
Descaling the steam generator is especially important if you have hard water, as mineral deposits can accumulate over time, reducing efficiency or even causing malfunctions. Use a manufacturer-approved descaling solution and follow the recommended schedule to keep the system running smoothly.
Don't forget to check all electrical connections for signs of corrosion or looseness, as secure connections are vital for safe operation.
Preventing Overheating
Proper ventilation and air circulation around the steam generator help prevent overheating and ensure that excess moisture can escape, reducing the risk of mold or electrical issues. By following a regular maintenance routine, you'll minimize the risk of unexpected steam generator problems, extend the life of your equipment, and enjoy a consistently comfortable sauna experience.
How Do You Maintain Sauna Stones for Optimal Performance?
Sauna stones are at the heart of a traditional sauna's heat and steam, making their maintenance crucial for both performance and safety. Proper stone care directly impacts heating efficiency and your overall sauna experience.
Stone Care Best Practices
To ensure even heat distribution and optimal air circulation, regularly clean your sauna stones to remove any dirt, debris, or mineral deposits that can accumulate over time. This not only helps maintain efficient heat transfer but also prevents unpleasant odors and potential damage to the heater.
Inspect the stones frequently for cracks, crumbling, or other signs of wear. Damaged stones can disrupt heat distribution and may even cause the heater to overheat. Replace any compromised stones with high-quality, sauna-specific stones designed to withstand repeated heating and cooling cycles.
When arranging the stones, stack them loosely to allow hot air to circulate freely—avoid packing them too tightly, as this can create hot spots and reduce overall efficiency.
Rearranging the stones periodically helps prevent uneven heating and extends their lifespan. By keeping your sauna stones in top condition, you'll enjoy a more consistent, enjoyable sauna experience and protect your investment for years to come.
What Are Common Control Panel Problems and Solutions?
Modern smart controls with Wi-Fi, apps, or Bluetooth audio add convenience but can introduce software-style problems alongside hardware failures. Understanding these issues helps you resolve them quickly without unnecessary service calls.
Typical Control Malfunctions
Common control faults include:
- Unresponsive touchpad
- Random shutdowns mid-session
- Inability to change temperature or time settings
- Noisy relay clicking inside the control box
Basic Troubleshooting Sequence
Power-cycle the system (breaker off for 5 minutes), verify all connections are secure, inspect the panel for condensation, and check for firmware or app updates.
Power surges and lightning—especially in outdoor infrared sauna installations—can damage control boards. Consider surge protection on 120V supplies where permitted by local code.
For Home Sauna units still under warranty (purchased after January 2022), document symptoms and error messages with photos before contacting support for a replacement panel or PCB.
Why Won't My Control Buttons Respond?
Clean the keypad. Wipe it dry, confirm no protective film remains, and check for visible cracks in the overlay.
Try a quick reset. Power off for 30–60 seconds, then test each button systematically. Note any patterns—if only "Up" and "Start" fail, that points to a specific membrane issue.
Reseat ribbon or plug connectors between the keypad and main board (with power off). Loose connections are common after installation or shipping.
Address humidity damage. Constant sauna humidity can cause oxidation on contacts. A qualified technician may use an electronic contact cleaner, but avoid spraying indiscriminately inside the control box.
If only the remote or app fails while the local panel works properly, the issue likely lies with the Wi-Fi or Bluetooth module or your router settings—not the core sauna controller.
How Do You Interpret Display Errors and Codes?
Error codes provide diagnostic information that points you toward specific problems. Here's what the most common codes mean and how to address them.
|
Error Code |
Typical Meaning |
First Steps |
|
E1 / E2 |
Sensor fault |
Check sensor placement and connections |
|
LO |
Low temperature reading |
Verify the sensor isn't touching a cold surface |
|
HI |
Overheat condition |
Improve ventilation, check high-limit sensor |
Resolving Display Issues
Clear transient errors by unplugging the sauna for 10 minutes, then restarting—but only after verifying there's no burning smell or visible damage.
Dim or flickering LCDs can indicate low voltage or a failing backlight. Test the circuit with another load or have an electrician measure the voltage.
App connectivity issues often require router reboots, confirming 2.4 GHz Wi-Fi availability, and checking for firmware updates via the manufacturer's app.
Avoid attempting board-level soldering or component swaps. Replacing the whole module is safer and typically supported by Home Sauna.
How Do You Address Air Quality and Ventilation Issues?
Stuffiness, lingering sweat smells, or visible condensation after use signal that ventilation or post-session drying needs improvement. Ventilation problems, such as clogged vents or faulty fans, can lead to moisture buildup, mold, and mildew. Proper airflow is essential regardless of sauna type.
Ideal Ventilation Layout
For traditional cabins, install one low intake vent near the heater (typically within 6 inches of floor level) and one high exhaust vent on the opposite wall (near ceiling height). Both must be kept completely unobstructed by insulation or paneling, following guidelines from the American Society of Heating, Refrigerating, and Air-Conditioning Engineers.
A small vent and leaving the door open between sessions prevent musty odors from developing. According to Epic Hot Tubs, regular sauna post-use ventilation can reduce mold incidents by 70%.
Unpleasant odors in saunas can result from mold, bacteria, or old stones. Deep cleaning saunas weekly with a mild cleaner or diluted vinegar can help prevent unpleasant odors.
Essential Maintenance Tasks
- Clean vents and exhaust fan intakes every 1–2 months
- Remove dust, cobwebs, and insect debris that block airflow
- For new saunas, run empty at 140–160°F several times to "bake off" initial wood and adhesive off-gassing
What Causes Musty or Sour Smells in Your Sauna?
Persistent odors indicate moisture problems or bacterial growth that need attention. Addressing these issues promptly prevents more serious wood damage and maintains a pleasant sauna environment.
Identifying and Treating Odor Sources
Inspect hidden areas: corners, under benches, behind backrests. Look for darkened wood or fuzzy growth indicating early mold or mildew.
Clean gently. Use warm water with a splash of white vinegar or a sauna-specific cleaner. Avoid harsh bleach, which can damage wood fibers.
Use towels on benches during every sauna session. This reduces sweat penetration into the timber and extends fresh air quality.
Investigate persistent odors. A smell concentrated in one spot could indicate hidden moisture behind paneling or under flooring—inspect vapor barriers or call a professional.
Never apply essential oils directly onto infrared panels or heating elements. Use these oils only on water poured over stones or on designated sauna accessories, such as aromatherapy diffusers.
How Do You Prevent and Treat Wood and Moisture Problems?
Cedar, spruce, and hemlock interiors naturally change over time. But wet, soft, or moldy wood signals a fixable underlying moisture problem—not just normal aging. Understanding proper drying techniques prevents most wood-related issues.
Common Moisture-Related Issues
Watch for:
- Bench boards that are still damp days after use
- Dark water lines on the walls
- Warping door frames
- Hairline cracks in boards (often cosmetic)
Here's what many owners don't realize: leaving a sauna door completely open in a cold space (like an unheated garage in January) can actually prevent proper drying. Cold, moist air condenses on warm boards instead of allowing moisture to escape.
Better Drying Approach
Run the heater on high for 10–15 minutes after sessions, with the vents open. Leave the door slightly ajar (not wide open) to let warm, dry air escape gradually. For exterior or container saunas, pay close attention to vapor barriers, roof flashing, and siding.
How Do You Deal with Mold, Mildew, and Persistent Damp Spots?
Mold and mildew thrive in consistently damp environments. Early detection and treatment prevent structural damage and health concerns.
Treatment and Prevention
Check high-risk areas: seams where benches meet walls, lower corners, and under duckboards. Look for green, black, or white spots.
Treat with hydrogen peroxide. Apply a 1:1 mixture of hydrogen peroxide and water with a spray bottle. Let it sit before scrubbing, then run the sauna to dry thoroughly.
Sand stubborn mold. Lightly sand affected cedar surfaces with fine-grit sandpaper, wearing a mask and ensuring good ventilation.
Look for external causes. Inspect exterior walls and the roof above persistent damp areas—leaks, missing flashing, or condensation behind insulation may be feeding moisture internally.
If you find widespread mold or soft, spongy wood, stop using the sauna until a professional evaluates structural integrity and the overall moisture path. This is especially critical for outdoor full-spectrum infrared sauna installations that are exposed to the weather.
What About Warping, Cracks, and Loose Boards?
Wood naturally expands and contracts with changes in temperature and humidity. Distinguishing normal wear from problematic damage helps you maintain your sauna effectively.
Normal vs. Problematic Wear
Small hairline cracks in bench boards are normal in a 3–5-year-old sauna and are mostly cosmetic.
Tighten or replace loose fasteners on benches and backrests annually, using stainless-steel screws rated for high-temperature use.
Severe cupping or bowing of wall boards usually indicates uneven moisture or poor ventilation. Improve airflow and consider targeted board replacement.
Outdoor saunas should be inspected each spring and fall for shifting, misaligned doors, and gaps caused by freeze-thaw cycles. Review the outdoor infrared sauna warranty and materials specifications for your climate.
When replacing boards, match the species and thickness for even expansion and a cohesive look.
How Do You Protect Your Sauna from Water Damage?
Water damage is a serious concern for any sauna owner, as it can compromise the sauna's structural integrity and create safety hazards, such as mold growth. Prevention is far easier and less expensive than repair.
Prevention Strategies
To protect your sauna, ensure proper ventilation and air circulation at all times—this helps moisture escape and keeps surfaces dry. Regularly inspect the sauna for signs of water damage, such as leaks, condensation, or discoloration on the floor and walls. Early detection allows you to address issues before they escalate.
Promptly repair any leaks or water intrusion, and use a waterproof sealant around doors, windows, and other potential entry points to prevent future problems. Make sure the sauna floor is properly sloped and drained so that water doesn't pool or seep into the wood.
Ongoing Inspection
Maintaining a consistent schedule of inspections and maintenance will help you identify and fix small issues before they escalate into mold growth or structural damage.
By prioritizing regular maintenance and ensuring proper ventilation, you'll safeguard your sauna's safety, extend its lifespan, and maintain a healthy, comfortable environment for every session.
What Strange Noises and Smells Require Immediate Attention?
Some sounds are completely normal. Others demand immediate attention. Learning to distinguish between routine operating sounds and warning signs protects your investment and safety.
Normal vs. Concerning Sounds
Normal sounds:
- Soft ticking of metal as it heats and cools
- Gentle cracking of wood joints adjusting to temperature changes
- Low fan hum in infrared saunas
Concerning sounds:
- Continuous loud buzzing from the heater relay
- Scraping in fan housings
- Repeated rapid relay clicking as the heater cycles on and off
- Sizzling is associated with loose connections or moisture in electrical components
Smell Assessment
A new wood aroma is expected to be pleasant. A sharp electrical or burning plastic smell is not—it requires immediate power-off and inspection. If you ever see smoke, shut off the breaker, ventilate the room, and only resume use after a professional confirms safety.
How Do You Troubleshoot Fans, Relays, and Moving Parts?
Mechanical components require periodic attention to maintain quiet, efficient operation. Addressing small issues early prevents expensive replacements later.
Component-Specific Checks
Listen for circulation fans in infrared saunas. If airflow stops and heat becomes uneven, the fan motor or its bearings may be failing.
Clean fans periodically: power off, remove the fan guard, vacuum dust from blades and motor housing, then retest for quieter operation.
Address relay issues. Loud or rapid clicking in the control box can indicate a failing relay, undersized wiring, or voltage drop. An electrician should measure amperage and connections.
Investigate sudden changes. Any sudden noise after years of quiet operation is worth investigating before resuming heavy use.
Do not oil-seal electric motors unless your manufacturer specifically provides lubrication ports and instructions.
When Should You Call a Professional?
While many owners can handle cleaning, stone rearranging, and basic resets, some tasks must legally and safely be left to licensed professionals. Knowing your limits prevents accidents and maintains warranty coverage.
Always Call an Electrician For
- Work inside the main service panel
- Replacing breakers
- Re-running 240V circuits
- Any electrical work beyond basic plug-in connections
Signs of Deeper Issues
Signs of deeper issues requiring professional help include:
- Recurring breaker trips despite fixes
- Repeated error codes after resets
- Scorched wiring or potential fire hazards
- Widespread mold behind panels
Recommended Inspection Schedule
- Annual inspections for heavily used units (5+ sessions weekly)
- Annual inspections for older units (installed before 2018)
- Seasonal inspections for outdoor infrared saunas exposed to harsh weather
Home Sauna customers are encouraged to contact us with their model, installation date, and photos so that support can advise whether a local electrician, carpenter, or warranty replacement is the most appropriate next step.
Which Problems Require Expert Intervention?
Certain repairs involve safety risks or specialized knowledge, making professional service the only sensible choice. Here's what should never be DIY projects.
|
Problem |
Why It Needs a Pro |
|
Element replacement on 240V heaters (6kW+) |
High voltage, code requirements |
|
Main control board replacement on smart systems |
Complex wiring, firmware calibration |
|
Structural repairs on container/outdoor saunas |
Rust, load-bearing, waterproofing |
|
Steam generator servicing |
Combined plumbing and electrical |
|
Carbonized wood near heaters |
Fire safety assessment needed |
Never attempt to repair steam generator problems yourself if they involve pressurized components, valve replacement, or level sensor issues.
What Preventive Maintenance Keeps Problems from Returning?
A light but consistent maintenance routine prevents most sauna failures and saves money over the life of your unit. This applies to every home sauna for sale option. Proactive care is the single most important factor in sauna longevity.
Daily Ritual
- Place a towel on the benches during use
- Quick wipe-down after each session
- Run a short dry-out cycle at a higher temperature with vents open
Monthly Check (15–20 minutes)
- Inspect stones for cracks or crumbling (traditional saunas)
- Tighten visible screws on benches and backrests
- Confirm vent openings are clear
- Test all control panel functions
- Look for new discoloration or odors
Annual Deep Maintenance
Spring is ideal for:
- Full stone reset and replacement of damaged stones
- Wood cleaning and minor sanding of high-traffic areas
- Control board inspection for corrosion
- Re-checking all visible wiring and junction boxes
Following the maintenance guidelines in your manual protects your warranty coverage and maximizes the lifespan of your heater and wood. Experts suggest regular maintenance can extend sauna life from 10 years to 25+ years.
What Is a Comprehensive Maintenance Schedule?
Regular scheduling takes the guesswork out of sauna care. Follow this timeline to maintain peak performance and catch problems early.
|
Frequency |
Tasks |
|
After every use |
Remove towels, wipe benches with a dry cloth, prop the door and vents open, run the heater 5–10 extra minutes if the wood feels damp |
|
Monthly |
Vacuum floor and under benches, clean vents, test door seal, check hinges, verify infrared panels heat uniformly |
|
Twice yearly |
Remove and wash stones (traditional), replace cracked ones, check exterior caulking (outdoor units), and clean glass |
|
Every 2–3 years |
Light sanding of bench surfaces, re-treat exterior wood with protective finish, electrician to check on major connections |
Consider keeping a simple maintenance log—either a small notebook near the sauna or a note on your phone. Recording dates and any repairs helps you spot patterns and provides useful information when talking to technicians.
Where Can You Find Additional Sauna Resources?

For Home Sauna owners looking to deepen their understanding of home sauna wellness and care, numerous resources are available to help you get the most from your investment.
Explore our comprehensive guide to the best home saunas available today to compare models and features. If you're experiencing issues not covered in this guide, don't hesitate to contact Home Sauna support directly with your model information and a description of the problem.
Investing in a quality luxury home sauna means investing in your health and relaxation for years to come. Most common sauna issues are completely preventable with proper care, and when problems do arise, they're usually fixable without replacing your entire unit. The key is catching small issues before they become major repairs—and knowing when to handle them yourself and when to call in a professional.
FAQ: Sauna Problems and Fixes
Why does my sauna in the garage stay damp even though I leave the door open?
Leaving the door fully open to a cold, humid space like a garage in early spring actually pulls moist air inside and prevents the wood from reaching drying temperature. Instead, run the sauna hotter for 10–15 minutes after each use with vents open, then leave the door only slightly ajar rather than wide open. If your garage has consistently high humidity, consider adding a small fan or a dehumidifier.
How do I know if my sauna heater is undersized for my room?
Calculate your room volume (length × width × height in feet) and compare it to your heater's kW rating. A general guideline for traditional Finnish saunas is approximately 1kW per 45–50 cubic feet. Large glass walls or exterior walls add extra demand. If preheat time consistently exceeds 60 minutes and peak temperature remains low despite proper stone arrangement and ventilation, upsizing the heater or improving insulation may be necessary.
Is it safe to use my sauna if there's a small amount of mold on the wood?
Small, surface-level mold patches can often be treated safely by cleaning with a hydrogen peroxide solution and thoroughly drying the sauna afterward. However, users with allergies or respiratory issues should avoid the sauna until the mold is completely removed. Widespread or returning mold suggests deeper moisture issues—fix the underlying cause before resuming regular use.
How long should a quality infrared sauna panel or traditional heater last?
Under normal home use (2–4 sessions per week) with proper electrical supply and ventilation, expect traditional heating elements to last 8–12 years, and quality low-EMF infrared panels to last 12–15 years or more. Visible damage, electrical buzzing, or uneven heat are signs to plan for replacement. Home Saunas’ components are designed for longevity when maintained according to manual guidelines.
Can I move my Home Sauna unit to a new house without damaging it?
Most modern modular infrared cabins and traditional cabins can be disassembled and reassembled by two adults. However, 240V wiring and hard-wired connections must be disconnected by an electrician before moving and reconnected properly at the new location. Keep all original fasteners, label panels during disassembly, and check seals and connections thoroughly after reassembly to ensure everything functions properly.
What can I do if I feel dizzy while using the sauna?
Dizziness in saunas can be mitigated by staying hydrated and keeping sessions short. If a user feels lightheaded, they should exit the sauna immediately, drink water, and rest until feeling better. According to Cleveland Clinic guidelines, it's important to listen to your body and never push through discomfort during sauna sessions.
References and Citations
- National Fire Protection Association (NFPA) – List Of 300+Codes And Standards
- Sauna Supply Company – What Are The Different Types Of Saunas?
- American Society Of Heating, Refrigerating And Air-Conditioning Engineers (ASHRAE) – Ventilation Guidelines For Acceptable Indoor Quality
- Epic Hot Tubs – Sauna Troubleshooting 101: How To Fix Common Problems
- Amplify Your Home – How Long Can I Expect A Sauna To Last?
- Sun Home Saunas – What Are The Electrical Requirements For Home Sauna?
- Cleveland Clinic – Get Your Sweat On: The Benefits Of A Sauna